 |
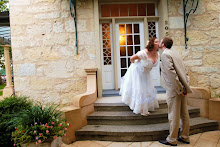
| Sam in his new Negroni shirt, designed by Colette Patterns but stitched up by moi. |
I am coming out of blogging hiatus to debut my most recent sewing success. I am proud to say that I did it! I finally finished Sam's Negroni shirt. You may remember that I promised him this shirt as a 30th birthday gift, back in April of 2011. Well, now more than 14 months later I have finally made good on my promise. And no, it does not take 14 months to sew the Negroni. I just procrastinated a lot. Like, a lot!
Sam feels great in the shirt and I think he looks sharp. I am proud of my craftsmanship, both outside and inside the shirt. Read on for a pattern review, or just to admire the pictures of him looking hip at our favorite Austin coffee shop.
 |
| The Negroni from the back, with a very handsome yoke. I fretted and fretted about his fit across the back shoulders, wondering if it pulls or wrinkles too much down into his armpit. But then I realized all mens shirts seem to do that. Maybe it is natural? |
 |
| The instructions clearly walked me through flat felling the seams, even at the arm. I messed up a few times and nearly gave up, but it turns out perseverance and a bit of easing on my perfectionism was key. |
Pattern Description:
The Colette Pattern's Negroni shirt is a classic men's casual shirt with a modern slim cute. The back is shaped with a yoke and two pleats. I made some pattern adjustments and converted the camp collar to a stand collar and added button plackets.
Pattern Sizing:
Multi-sized S-XXL for a 34-52 inch chest. I made Sam a size XL.
Fabric Used:
I used Carolina 1" Gingham Navy by Robert Kaufman. Carolina Gingham is a 100% cotton simple woven fabric; warp and weft overlap one another to create a pleasurable, classic plaid pattern.
Pattern Alterations or any design changes you made:
We did several tissue fittings in order to make adjustments. The biggest issues to work around were 1) getting a slim fit in the yoke and the back shoulders, and 2) adjusting the fit of the collar and neck area, to avoid a big gape that inevitably shows up when Sam wears Ready to Wear button ups. Tissue Fitting I showed me where I would needed to adjust the shoulder width in order to give it the slim fit that Sam really likes. In Tissue Fitting II we re-sized the shoulder. I relied heavily on a shoulder-fitting post by Peter of Male Pattern Boldness in making this adjustment.
To address the shoulder fit, I matched the shoulder seam to Sam's pivot point at the top of the shoulder. To do this, I think I narrowed the shoulder width, which of course meant making changes to the yoke, the back, the front AND the sleeve. I used Peter's example of taking fabric away from the shoulder yoke and front of the shirt and transferring the excess into the sleeve cap as my guide for this adjustment.(THANK YOU Peter!)
The front issue around the collar was solved with a 3/4 inch square shoulder adjustment (adding 3/4 at the shoulder pivot point and tapering to nothing at the collar). By decreasing the shoulder slope, I seem to have fixed some of that issue. To be honest, I forgot to look when he was wearing the shirt, and in the dizziness of the gingham I can't really tell if the fabric is still folding. But all in all I think it worked.
The length was perfect for Sam, as he has a long torso and long monkey arms. No length was added or subtracted.
As far as design changes, I added a stand collar following Peter's wonderful tutorial - Part I, Part II and Part III. I then also added a a button placket (covered by Peter in Part I). I cut the yoke and the pockets on the bias. I wish I would have cut the button placket on the bias too.
 |
| Doesn't he look handsome from the side? The length and the bold gingham are slimming and very manly. |
 |
| I cut the pockets and the back yoke on the bias for design detail. |
What did you particularly like or dislike about the pattern?
This was a wonderful way to learn mens shirt tailoring. As with all Colette patterns, the instructions were impeccable (in their cute little book), the pattern was well tested and everything came together well. I am a big fan of the button placket and have a hunch I would have disliked the front facings in the original pattern, so I am glad I swapped those out. I don't have any major dislikes.
Would you sew it again? Would you recommend it to others?
I highly recommend this pattern to anyone attempting a mens shirt for the first time. The pattern is great, plus the Colette pattern community really provided the additional resources and tutorials needed to learn the techniques. I may end up sewing this again, although I am a selfish seamstress. Plus, at the rate I finished this I am not sure I will get to another one for another several years. Ha.
Conclusion:
Colette Patterns excels at timely yet classic designs in patterns that are easy to follow and produce outstanding results. The Negroni shirt is no exception.
 |
| This really is just the perfect shirt to wear in Austin. That's my hipster honey! |
 |
| I made a mistake on the front button placket and did not measure my gingham spacking correctly. But, it was too late to redo everything by the time I figured it out, so we are leaving the double thick blue stripe as a design feature. I actually think it looks better in person than in the pictures. It almost looks like it could have been done on purpose. Almost. But Sam says he doesn't care. |


3 comments:
Welcome back to the blogosphere! How nice to see your crafty mojo is on. Sam looks so handsome and crisp.
The shirt looks awesome! Very RTW-looking but better because it was made by you.
This post is absolutely brilliant! Thank you so much for sharing!
Post a Comment