Showing posts with label pattern review. Show all posts

Sunday, January 30, 2011

Pattern Review: Colette Madeleine Mini Bloomers

These pretty little bloomer shorts are designed to rest underneath a new Burda Allie robe. When Claire visited in December, I promised we would sew. First I promised pajama pants, but then I remember how most PJ pants are frumpy and ill-fitting and just sooooooo unsexy. What's a girl to do?

Then I remember, you know what is super sexy? Colette Pattern's Madeleine Mini Bloomers. I mean, just look at them. They are short. Low cut. Cute and approachable, but with some sex appeal. And best yet, the pattern is free and easy to sew. So we changed plans. PJ pants gone, mini bloomers under the presser foot.

The pattern review is below. Find you copy of this little beaut online at Colette Patterns. With Valentine's day right around the corner, it's the perfect time of year for these.

Pattern Description:
From the website: These are no prim and proper Victorian bloomers. They sit low on the waist, and are scandalously brief. The back view is particularly flattering. The waistband is sewn with two rows of elastic, and the legs are cinched with a length of ribbon. With just two pattern pieces, a beginner who is comfortable with elastic and buttonholes can make these.

Pattern Sizing:
Multi-sized for XS to XL, which encompasses the usual sizes 0-18 (equivalent to ready to wear) in Colette Patterns’ range, roughly hip size 35 inches to 48 inches.

Fabric Used:
We used Anna Maria Horner's Innocent Crush Viole, including the pattern "First Impressions - Blush". The cotton was GORGEOUS, very soft with a lovely drape, and easy to sew. We purchased all fabric from Fancy Tiger in Denver, Colorado and they were incredibly helpful.

Pattern Alterations or any design changes you made:
We sewed Claire's bloomers in a size medium, no pattern alterations made.

However, for mine (featured) I made a few adjustments based on Patty the Snug Bug's review and advice to add some rise length and width. I added two inches of length to the front and back pieces to bring the rise up and waistband closer to my navel. This was a good adjustment.

Also, fearing the size XL would be a bit too tight over my midsection, I graded the front pieces wider by two inches by slashing and spreading 1" extra to each side of the front. This turned out to be a bad choice and a silly adjustment on my part. First, the finished shorts would have been plenty big without the extra two inches, completely unadjusted. But even if I had wanted to add some width, I only really need extra room over the tummy, not over my narrower hips. Colette designs for a "curvy" gal, and her patterns seem to all curve in at the waist. Instead of a straight 1 inch grade all the way down, I should have just straighten out this waist curve and added the inch there alone, truing to the existing hip line. Make sense?

We did not succeed in adding the pleats to the lower leg opening as the pattern suggests, as I could not quite figure out how to work this around the button holes I had already added. They look really adorable in theory, but I don't miss them either.

What did you particularly like or dislike about the pattern?
Like: This is a quick sew.
Like: It's free!
Like: The instructions are clear with great illustrations.
Like: The generous fit means this can be versatile for different sized and shaped people.
Like: The double elastic casing that forms the waistband is GENIUS. It looks super cute and girlie, it was a cinch to sew, and it helps hold the little shorts up like a champ.

Dislike: The rise in the design is really, really low. I mean, loooooow, like, "how low can ya go?" low. Take a look at the the sample on the model here, and you might find yourself thinking "wow, those are low, that model must have a really really long waist"... well, think again. Sure, the model is long and lean, but more than that, the bloomers look that low because they ARE that low. :) They were nearly too low for my 24 year old svelte and flat tummied sister Claire. She admitted she would like at least two more inches in the rise to be considered decent (and comfortable). I added two inches to mine, but the finished product is still really low. I think I really needed four inches extra length total. Even with four inches added to the rise, they will still rest comfortable under my belly button in a very respectable "sexy" position. Consider yourself warned, the rise needs some adjustments for most.

Dislike: The buttonhole placement on the pattern and the point at which the instructions indicate making the buttonhole.... I might suggested waiting a bit and ironing up the hem to gauge placement of buttonholes before adding them to the pattern. This would ensure they fall on the right place for your thighs.

Would you sew it again? Would you recommend it to others?
I highly recommend this pattern. There's nothing to loose, its a great beginner project, and it is a nice way to utilize some shorter lengths of fabric from your stash.

I do have a suggestion on creating the leg casings for the ribbon. I am not entirely sure about the instructions for construction of the leg opening. My fabric did not fold and stitch exactly as she suggested it would. I strongly recommend playing with the leg hems and casing area a bit before sewing or adding button holes. Iron out your seems BEFORE you make the holes (the old measure twice, cut once advice).

I also suggest incorporating some elastic into the leg casing. I want my bloomers to look very gathered at the thigh for the flouncy effect. However, I find my thighs spread a bit wider when I sit or lay in certain positions verse when I stand. So, if I tie the ribbon for standing, they feel to tight when I sit or lay. But if I tie them for comfort sitting and laying, they look too loose when I stand. A happy solution would be to attach elastic to the ribbons and run this through the casing. Then I would have the ease of stretch to accommodate movement, but the look of ribbon poking out the casing as designed.

Conclusion:
Cute cute cute! There is no reason not to give these a go.

Wednesday, January 19, 2011

Pattern Review: Burda Style's Allie Robe

My sister Claire is a budding seamstress, so when she planned a Christmas visit, I promised her some sewing. I originally lured her in with a promise to make pajama pants (sadly, the first pair I made for her never worked out), but as I started to plan for the project, I thought "who wants to wear boring old pajama pants anyways?" Instead, I opted for more sophisticated, whimsical lounge wear. We sewed Burda Style's Allie Robe and matching Colette Pattern's Bloomers.

I have two machines, and originally we were going to sew our respective lounge wear simultaneously, me working on my bloomers and robe, and her working on hers. But time got away from us (actually, we spent too many late nights watching Mad Men Season 1 and then sleeping in late in the mornings), so to hustle our efforts I helped with her projects. Two hands on one robe is better than one, I always say!

Pattern Description:
The Allie Robe is a kimono sleeved dressing gown or robe with a loose fit and dramatic kimono sleeves. The pattern is designed to feature big blocks of color or pattern, as the sleeves, back, sides, and front center pieces are separate.

Pattern Sizing:
The pattern features European sizing, sizes 34-48. This essentially translates to a US size of 2 through 14 (or a 24 1/2 waist to a 32 1/2 waist). For Claire we sewed a size 42, roughly a US 10. Because this is a pattern with lots of ease, the sizing is more flexible.

Fabric Used:
The fabric chart recommends using 3 1/2 meters of fabric, but this is for a cutting layout using all one fabric. In my opinion, all one fabric defeats the design elements of the pattern (and certainly refutes the suggestions and sample garment published by Burda Style). To accommodate three different types of fabric, I had to use 6 yards of 54-60" material (1.5 yards for the Sleeves/Belt, 1.5 yards for Center Front/Back Center, and 3 yards for the Side Front/Side back).

We used Anna Maria Horner's Innocent Crush Viole, including the pattern "First Impressions - Blush" and Anna Maria Horner's Little Folks Viole in "Square Dance - Dusk" and "Pastry Line - Marine". The cottons were GORGEOUS, very soft with a lovely drape, and easy to sew. We purchased all fabric from Fancy Tiger in Denver, Colorado and they were incredibly helpful.

Pattern Alterations or any design changes you made:
I substituted handmade bias binding for the facings, as facings seem messy and floppy in a lounge robe (in my opinion). I created bias binding from left over pieces of the fabric and used it to trim the robe opening and the hem. Because of this I eliminate any stabilizer or interfacing, except in the collar and in the sash. I also added an inside tie at the waist to help hold the robe closed when lounging. Other than that, I sewed the robe as instructed and designed.

What did you particularly like or dislike about the pattern?

Like: The design is lovely. The blocking in the pattern design makes this an interesting robe. I love the ample and dramatic fit of the kimono sleeves.

Like: This is a quick sew.

Like: The generous fit means this can be versatile for different sized and shaped people.

Dislike: I dislike tracing patterns or taping hundreds of pieces of paper together, so I took the PDF to FedEx Kinkos and they printed the pattern on their large scale printer for $15. Of course, at this price the pattern becomes as expensive as a commercial pattern, but it saves so much time and energy that it is worth it.

Dislike: The facing design seemed odd to me. I almost always find that facings flap open on wraps and seem to poke out of the inside of a garment. This designed called for facing the front and neck. It was an easy fix to swap bias binding for facings, so that's what I did.

Dislike: The instructions are sparse and do not clarify much with illustration or descriptions. Because of this, the robe is best sewn by someone with basic sewing experience or a good mentor. Luckily, there is not much technique in the construction, but certain parts of the sewing - like creating the collar or attaching the belt loops - was completely vague. I recommend keeping the instructions up online while you sew. The PDF that comes with the online pattern purchase is too small and awkward to be much help, but the online instructions include larger and more complete images.

Would you sew it again? Would you recommend it to others?
I am in the process of sewing it again, for myself. As the sizing does not go quite big enough for my measurements I am going to grade the pattern up by adding a few inches to the side seams, and do a Full Bust Adjustment to add some inches across the chest.

I recommend this for beginners with some experience, or beginners sewing with someone with some experience.

Conclusion:
This is my first Burda Style pattern and I enjoyed sewing something with a little more pizazz than the big four pattern designs. I do not enjoy the printing, taping, and tracing required of Burda, but it is a necessary evil for this affordable and fashionable pattern line. The good news is that I have the fabric and the pattern ready to go to create my own version in a slightly larger size, so it will be interesting to repeat the project and see if I can't iron out any kinks.

* This is me modeling her robe before mailing it home to her in Colorado. I am significantly larger than she is, so the size 42 was not quite big enough to comfortably wrap. However, I plan to make this in the size 46, and add a few inches to the side seams and perhaps a small full bust adjustment. I think it does have very flexible sizing and I was surprised that I could fit into her smaller size at all.

Monday, May 3, 2010

Liberty of London Sunflower Dress Redesign.

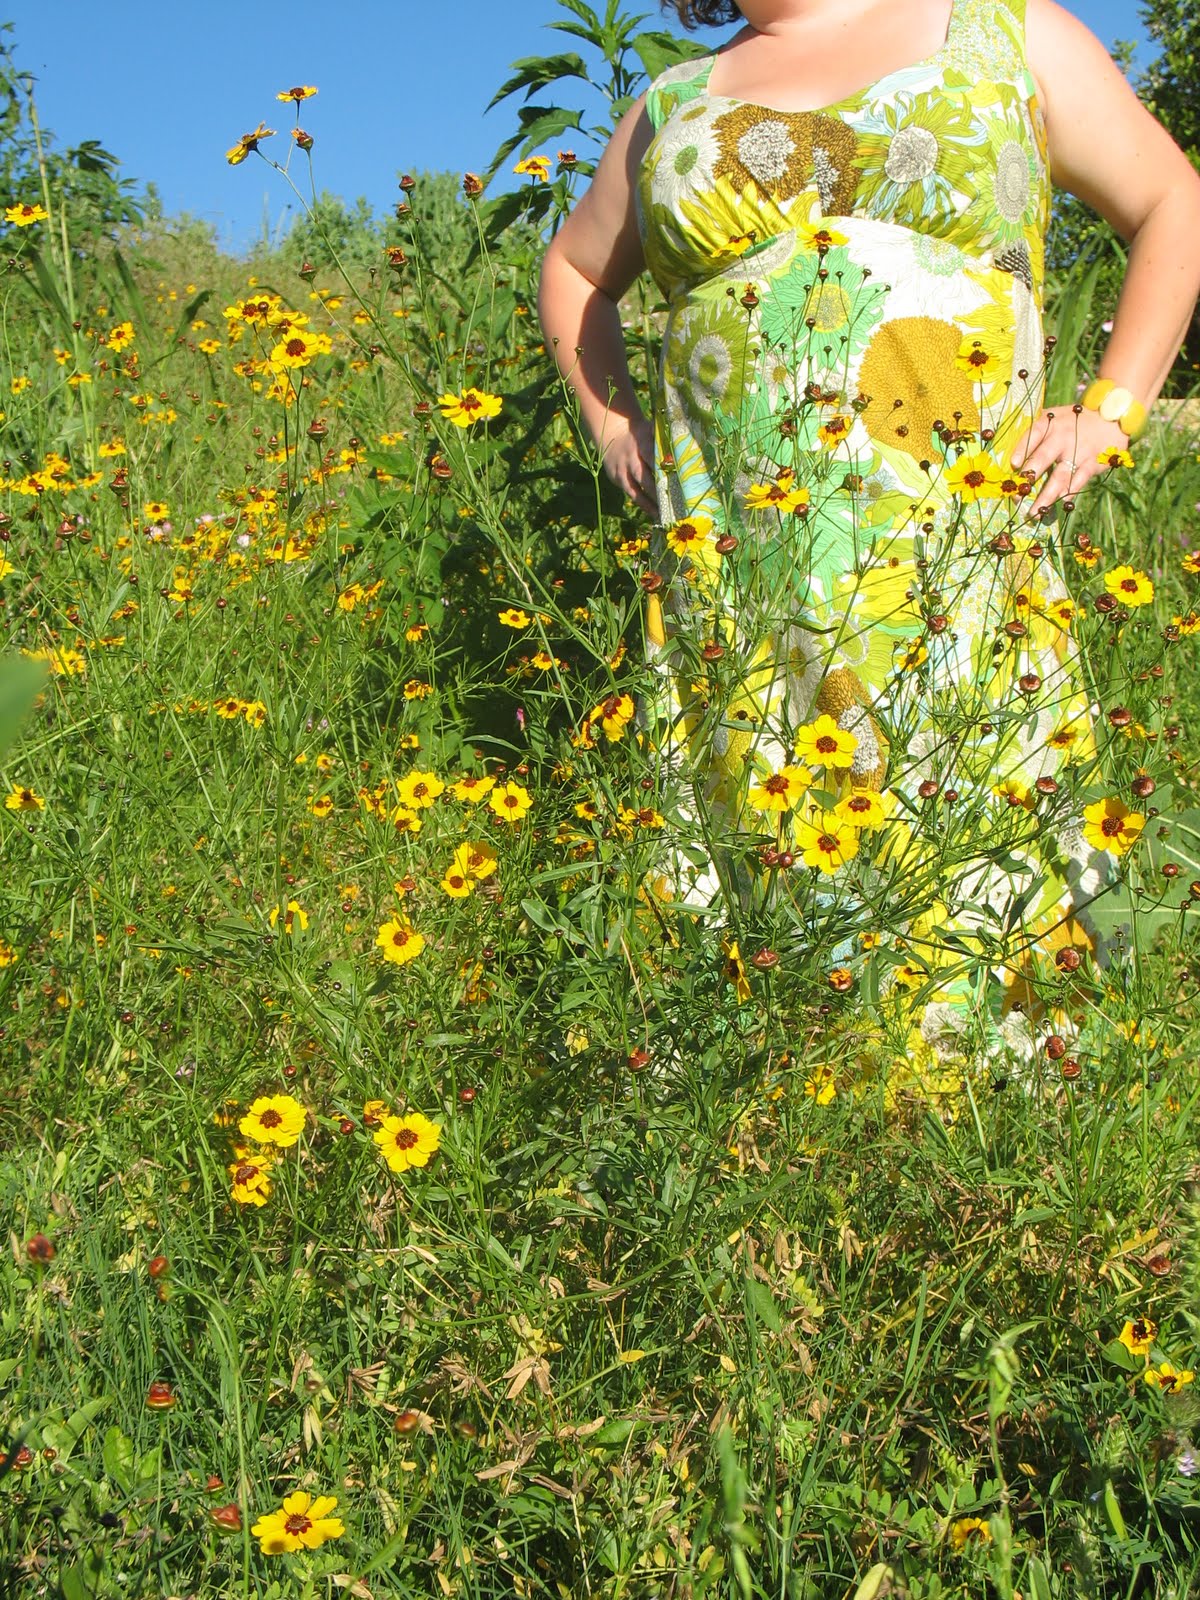
Remember my Target spending spree when the Liberty of London line came out? Well, I returned most of it, except a couple of childrens dresses destined to be fused into one adult sized garment. In fact, I hustled a few weeks ago to sewed this dress to wear in Hawaii, and then I carted all the way to Maui without wearing it! Silly me. However I am still super excited by this dress, mostly because I love the sunflower print, and also because I am proud of my redesign work to turn a childrens sized gown into a plus size summer sundress.

I used the bodice portion from Simplicity 4401 (Misses/Women's Evening Tops and Skirt) to create the new bodice. Because I am lazy, and also because I did not know exactly how to do a full bust adjustment (FBA) on a pattern that gathers under the bust, I sewed the size 28W. To make it fit I added an underarm dart, which I simply pinched out from the piece while wearing my muslin cutting to ensure it fit my shape. The pinch to fit method actually worked so well to create a snug, shapely fit that I may try it again in the future.

According to the pattern, the top is designed to angle upward at the center bust, rather than follow a parallel line to the floor. However, I sewed the Simplicity bodice to the garment parallel regardless in order to follow the elastic seam of the existing Target dress. What resulted is a low cut dress and a bit of looseness under the armpits, with some resulting extra fabric. However, since I added a tie closure at the back of the dress, I am able to gather the excess into the tie without problem.

For the back closure, I extended the length of the straps so they could button to the existing smocked dress bodice. I also added extended strips of fabric to the sides of the bust piece on each size with the intent of pulling them tight and knotting them along the back, sort of like a sash. It has the benefit of allowing me to only attach the bodice along the bottom of the existing smocked bust section, leaving the back totally open and free. This allows more flexibility of fit, since I just pull the long back tied tightly in order to make the front fit snugly. I think you can see it all clearly in the backside image (plus my awesome Maui tan-line, even with SPF 70 on!).

I think the A-line flow of the dress and the ankle length are very flattering for my figure. I am able to fulfill my fantasy of the comfort and ease of a maxi dress without the excess fabric or hippie-esque nature of other maxi dresses. Plus, I feel very clever for reinventing the piece into something that fits (although I still can't believe a Girls size XL could even squeeze around my middle!).

Bring on the summer patio parties, because I really feel great about the dress and I plan to wear it again and again. I love the Liberty pattern and the details of the original design like the ruffled pockets and green trimmed lining. I think I managed a flattering and well-fitting adjustment. Most of all, I am proud of my ingenuity to make a piece of the Target Liberty collection work for me. Now, of course, I feel like to need to visit Hawaii again to war it as intended. Or I could just whip up a quick Mai Tai in my own kitchen and wear it lounging on the front porch. I have a feeling for which of those scenarios is likely to happen first!

p.s. The wildflowers in Texas were absolutely astounding this year, perhaps the best in my short memory of South Texas wildflowers. Many of them continue to bloom strong, popping bright shots of sunshine and life in the most unassuming patches of dirt around town. Just the other day I was driving the highway through a part of the city I rarely visit, and I took one of those cloverleaf exits that loops you in a big circle onto the next highway. As I drove around, I looked into the usually dry, patchy center of the loop and saw huge burst of wildflowers in yellow, orange, purple, and red glowing from this little patch of destitute, usually ugly highway. It felt like I was driving into a giant whirlpool of wildflowers. It was sincerely a sight to behold, and it reminded me that beauty can indeed be found anywhere you are willing to look closely.

To echo the long imitated words of my college photography professor, "I think these photos have a painterly quality." Except my professor had a British accent, which made the statement sound more comical. I think the real reason it was funny was because we did not understand that painterly is a legit art term. Now that I know it is true in the wisdom of my adulthood, I can say that these images remind me of a watercolor. Beautiful.


Thursday, October 29, 2009

Asymmetrical Folds Skirt - The Fall Version.

Well, it's almost Halloween, which means here in South Texas the weather is finally dipping below 80 degrees and the sun fades earlier in the evening. The trees and grass still grow green, and my air conditioner hums along at least 75% of the time, but the grocery store is stocking fresh pressed cider and I bought candy corn for a ceramic pumpkin dish in my kitchen, so in other words, it's fall.

And what better way to celebrate than with a new fall skirt? This is none other than my favorite Asymmetrical Folds Skirt pattern, but this time sewn up in an Autumn cotton blend. I reviewed the skirt this winter in great detail already, so below is a modified pattern review for this version. If you like this, and if you like the original in green velvet, stay tuned. You just might be in store for a treat (no tricks) next week.

Pattern Description:
The pattern comes from the inaugural issue of Stitch magazine, a publication from Quilting Arts. "Add a modern twist to the classic wrap skirt by working all the angles. Asymmetrical folds that button down the side, the shaped hem, and contrast lining guarantee you'll be a standout in any crowd." The skirt is a take on the basic wrap, but with more decorative closure that includes a four-buttons detail closure along the hip. Each buttonhole is made near the edge of the skirt, through folds of doubled over fabric. Part of the lining shows with each fold, and the hem is raised asymmetrically into a gentle arc as a result of the doubling-up of layers on the edge.

Pattern Sizing:
The skirt comes in five sizes XS (26 3/4 inch waist) to XL (38 1/2 inch waist). I sewed the XL with plenty of room. Previously I attempted to increase the size, as XL is often too small for me, but it turns out the Stitch version of XL is plenty big. It would be a simple pattern to tissue fit, so consider taking your measurements and comparing to the actual pattern pieces before choosing your size.

Fabric Used:
I picked up the beautiful stretch-cotton, fall fabric at Elfrieda's Fine Fabrics in Boulder, Colorado on a trip home earlier this spring. I bought five yards thinking it might become a dress, but I never found the perfect frock pattern (or the nerve for such a vibrantly patterned dress). So, I thought, why not use some of the yardage for a work appropriate skirt? The lining is synthetic "linen-like" fabric in brown that I choose for color, easy drape, and low price.

Pattern Alterations or any design changes you made:
An important heads up – the pattern pieces for the skirt facing and interfacing are shorter than the actual skirt, but they should be the same. Make sure you measure and make adjustments before cutting out the facing pieces. A formal correction is available on the Stitch website here.

With that said, I lined the entire skirt rather than only lining the facing area per the instructions. It is just as easy to sew a second skirt for the lining and attach them along the side and waist seams. The lining gives the skirt a bit more body, as well as a bit more modesty and substance. On my first version of the skirt, I stitched the entire lining to the outside of the skirt inside out, and turned them to secure the lining on all four sides of the skirt (waist, sides, and hemline). On this version I only stitched the waist and sides together, and instead hemmed the skirt and lining separately. They remain unattached. The lining hem is about 3/4 inch shorter than the skirt, so it never pokes through. This is an infinitely better way to line the entire skirt than my first version.

What did you particularly like or dislike about the pattern?
I have no dislikes. I just love the drape and style of the skirt. The pretty Grecian-style drapes along the mid section camouflage a tummy, and the asymmetry creates a nice visual line down to the calf. The cut is flattering for all shapes and sizes. I like that the pattern was a piece of cake to cut and sew, with only three major elements plus facings. Also, after cutting out the fabric, the skirt only takes about an hour and a half to sew, including hemming and buttonholes. It offers instant gratification.

Would you sew it again? Would you recommend it to others?
Stay tuned next week to find out the answer to this little question.

Conclusion:

This is a fun and simple skirt with more personality than your average wrap. I think it works for work, dress up, and play depending on fabric. Best yet, it is easy to fit and makes a great project for beginners.

Thursday, May 14, 2009

Reinvintage: A Mexican muumuu becomes a tunic.

Before...

...and After.

Look at my (self proclaimed) brilliant reinvention of a vintage thrift find, or to summarize a "reinvintage!" I wanted to write a sewing pattern review for this, however, it hardly seemed worth a pattern review as all I did was hem the muumuu into a shirt.

I purchased the dress at San Antonio's new, local, wannabe Buffalo Exchange called Stitch to Wear. It is a clothing resale shop with a small design department. The endeavor is only a few months old, and only boasts a few racks of recycled clothing, but I did find this amazing piece as well as a beautiful velvet vintage skirt that is sized for a 22 inch waist, but was so pretty and inexpensive that I had to buy it anyway. If you have a 22 inch waist and are looking for a purple floral print velvet skirt, AND if you can replace a zipper or will hire someone to do it for you, then let me know. I have the skirt for you. It is my gift to the person willing to take a picture of themselves wearing it out, so I can live vicariously through you. Anyways, back to the muumuu dress.

This dress was a real gem because of the yoked collar and fitted shoulders. I knew on first glance it would make an adorable tunic. And it was perfect timing, because my beautiful sister Ellen was visiting and she was a natural fit. It took a bit of convincing to make her see that this muumuu could be a fashion gem, but she came around. In fact, it was her excellent prompting to lengthen where I planned to hem that saved this shirt. My one word of advice for others performing this type of reinvintage is to hem long. You can always take it up more, but you can never make your cropped muumuu into a cute tunic once you cut it too short.

Next up, keep your eyes out for the pending reinvintage skirt, featuring none other than a great scene of a palm tree, senorita, and her Mexican beau relaxing on a sunny, slightly cloudy day.


Saturday, March 28, 2009

1932 Draped Wrap and Cape: Pattern Review

1932 Draped Wrap and Cape: Pattern Review

I understand from the pattern proprietor that this pattern was reviewed in Threads magazine in January 2006. They sewed up the wrap in a silk lace that was beautiful. So, if you have that issue or can hunt it down, see what they have to say. Their insight may compliment (or refute) mine. In fact, if you do find the review I would love to see what they said and their photos of the finished product. Please consider sending a scan of it my way. You can email me here.

Pattern Description:
The pattern comes from my favorite company Decades of Style. As the pattern envelope says "This fabulous draped wrap and cape is a vintage style from the sophisticated early 1930s that's perfectly at home today."

I created the draped hip wrap, with a sleeve on one side and a cape treatment on the other. The sleeve is 3/4 length with a bell shape the widens at the exit. The boat neck-style neckline provides a great opportunity to show off your favorite vintage or antique brooch. The pattern is snug-fitting and designed to be worn as a light wrap and not over many layers.

It is a very unique design that (in theory) will work well with everything from jeans to formal evening wear.

Pattern Sizing:
I sewed a size C, designed for up to a 46 inch bust. That is my high bust measurement, but I am also broad shouldered and large busted and I wish I would have opted to sew size D, designed for a 49-55 inch bust. The final wrap was too small for my frame. The pattern ended up fitting my narrow-shouldered mother, probably a 38 inch bust and a size 12 in modern clothing.

The wrap is a very snug fit, so consider sizing up a few sizes. It MUST fit your shoulder width in order to drape as it should, which means you may want to go a few sizes up if you have a broad figure. You will also want to cut a muslin in a draping fabric to test before you cut into anything expensive.

As the pattern envelope says "Choose your size carefully. It makes a difference! "

Did it look like the photo/drawing on the pattern envelope once you were done sewing it?
Nope. Sadly my finished product did not have the glamor and easy draping fit shown on the pattern envelope. The front cape treatment did not wrap around the front neck and lay over the shoulder as the pattern illustration describes. You can see images of the in progress garment frustrating me with its ill fit wrapping earlier in my blog here.

I wrote Decades of Style for advice during the fitting process and they kindly wrote back with words of honest reflection and encouragement. They said, "In all honesty, the pattern just did not work the way the illustration showed it – with the ends wrapping around the neck and fitting all smooth and beautiful... I (pattern designer) ended up wearing mine by tying the free ends together in the front either at the waist or up slightly towards my shoulder. It made the wrap look completely different from the illustration but it was still attractive and unusual."

Were the instructions easy to follow?
As with all Decades of Style instructions, I found them well organized, easy to follow, and complete. The large illustrations of each phase of the process make it easy to follow along, even without much sewing experience.

What did you particularly like or dislike about the pattern?
Likes: The concept. The simplicity of the design. The utterly unique vintage style.

Dislikes:
Well, the disparity between the pattern illustration and the final fit is a huge disappointment. It is like false advertising when a pattern illustration looks differently from the final product.

The fit of the wrap is very difficult, especially around the shoulders and the bust. For my large busted figure, I just could not make it work. This is not necessarily a flaw of the pattern, but rather a flaw of my shape in combo with the wrap.

Additionally, even on my narrow and smaller mother, the wrap still pulls on the body as it is worn. As mentioned, the final product fits my mother very nicely and she has adopted the garment and is modeling in these photos. Unfortunately, as she wears the well-fitting wrap, it still pulls on the body. The inside of the wrap that attaches underneath her sleeved arms to hold the garment closed wants to pull askew forward. Something about the physics of the long wrap portion makes the garment want to shift out of whack. I am not an expert seamstress, so I have not exactly figured out what is happening or how to fix it, but I do know that this wrap is the kind of piece that will need constantly adjusted while wearing to keep it in place. That is never the optimal situation.

Fabric Used:
The pattern suggests to choose a fabric with a nice drape, anything from velvet to wool, or possibly a corduroy or fleece. I choose a beautiful and softly draping gray wool dotted with flecks of green, red, blue and yellow. For the lining I used a very high quality burgundy rayon. Both were purchased from Elfriede's Fine Fabrics in Boulder, Colorado. It is the only place I want to buy fabric these days, and I don't even live in Colorado! Her staff is incredibly knowledgeable and helpful and she stocks only the highest quality clothing materials. Plus, she has an array of buttons that would make even a non-sewer squeal with delight. The wool worked well for this project, although something with even a looser and softer drape would proably have been even better.

Pattern Alterations or any design changes you made:
I ended up putting gathers in the lining rather than darts. Truth be told, at one point I did indeed have darts sewn into that darned rayon lining, but I sewed them in backwards. I had to rip them all out, leaving a bit of a mess in the fabric. My patience level was low, and I am not sure the fabric would have survived additional pinning and restitching of the darts, so I opted to run a gathering stitch the length of the darted area and pull it down to size. It appears to have worked well, and I would almost recommend this as an alternative to darting the lining in the first place. "Why make darts when you don't have to?" is my motto.

Would you sew it again? Would you recommend it to others?
No. I am such a loyal Decades of Style fan that it pains me to say this, but this is not a pattern I recommend. It is just as well I guess, because the pattern is no longer available. It's officially out of print (although with careful searching you can find it still at 3rd party vendors).

Conclusion:
This pattern is a great idea but a flop in its original form. With modification it can bcome a lovely wrap with unique style. A muslin in a draping fabric is a must, and don't forget to watch your shoulder fit carefully.


p.s. I grew up with a Portuguese Water dog - Henry - who looked JUST like this lovely little puppy my Mom sat with in the park for this photo. They are the nicest, sweetest, calmest, most loyal animals. My dad is proud to say that he knew how great Water Dogs were long before Obama did, so he now considers himself trendsetter. My brain went into a time warp when I saw this picture because that dog looks just like Henry did, right down to the red leash and collar and black floppy hair in the eyes. Our Henry has been gone for about a year and a half now and we miss him. So every time we see a Portuguese Water dog we like to stop and say hello and pat their head. It is a little bit like being with Henry again.

Monday, February 2, 2009

Asymmetrical Folds Skirt: Pattern Review

Well, would you look at me? I FINALLY finished sewing another garment. This one was, for the most part, a piece of cake. I started the project over Christmas break when I had two weeks off from work, and I completed almost all of it on my own. However, the button holes proved tricky on my vintage machines and I had to wait and call in the assistance of the Alamo Stitchin' Post to put the finishing touches on it last weekend. But now this beauty is finished and ready for wearing. My parents are coming at the end of the month and I think I will take them out for a night on the town in this little green lovely. Don't forget to peak at the lining in the photos below.

Asymmetrical Folds Skirt: Pattern Review

Pattern Description:

The pattern comes from the inaugural issue of Stitch magazine, a new publication from Quilting Arts that is "A special issue devoted to the creative possibilities of sewing wearables, home décor, accessories, and gifts." The skirt is featured on the cover, and from page 39 in the magazine "Add a modern twist to the classic wrap skirt by working all the angles. Asymmetrical folds that button down the side, the shaped hem, and contrast lining guarantee you'll be a standout in any crowd."

In more descriptive words, the skirt is a take on the basic wrap with more decorative closure, including a four-buttons detail securing the outer wrap to the base of the skirt along the thigh. Each buttonhole is made near the edge of the skirt, through folds of doubled over fabric. Part of the lining thus shows with each fold, and the hem is raised asymmetrically into a gentle arc as a result of the doubling-up of layers on the edge. Think of the asymmetrical folds and buttons as large scale ruching, as they achieve a flattering gather and drape of fabric across the midsection.

Pattern Sizing:
The skirt comes in five sizes XS (26 3/4 inch waist) to XL (38 1/2 inch waist). I found the sizing to run very large, which almost never happens. I made a muslin and added several extra inches on each pattern piece to accommodate my wide waist (My own waist measurement is significantly greater than the pattern's XL). However I ended up taking off almost all of the additional inches to keep the seams in line with my hips and the wrap closure where it should on the outer thigh. I think the pattern runs very big. I recommend at least doing a rough guess tissue fitting to measure your size before you cut fabric.

Did it look like the photo/drawing on the pattern envelope once you were done sewing it?
Absolutely. Down to the last stitch.

Were the instructions easy to follow?
The skirt is simple, as were the instructions. The most difficult part of the instructions is tracing the skirt pattern from the enclosed multi-pattern insert. This was my first time tracing a pattern from a magazine insert, and holy moly, finding the appropriate markings on the insert felt like brain surgery.

What did you particularly like or dislike about the pattern?
Likes: I just love the drape and style of the skirt. The pretty Grecian-style drapes along the mid section camouflage a poochy, and the asymmetry creates a nice visual line down to the calf. The cut is flattering for all shapes and sizes. I like that the pattern was a piece of cake to cut and sew, with only three major elements plus facings. I lined my entire skirt in a rose print, rather than only adding facings, so I also love having the secret pleasure of a pretty lining peaking through. What fun!

Dislikes:
I hated tracing the pattern from the magazine foldout, but luckily a simple A-line wrap uses very few pieces and is a simple shape. Even with the pain of tracing, I adore the fact that the pattern came with the magazine at such a responsible price, so I can't complain too much.

Fabric Used:
I strayed into synthetics for this project, something I almost never do, but I loved the color, pattern, and texture of my materials. The outside of the skirt is a deep green polyester velvet. The inside is a synthetic "silky" bold rose print that is less slippery than rayon or silk, but still very soft for a lining.

This was my first time working with either material, and the velvet proved challenging 1) because it slipped everywhere as I sewed, so I had to pin baste the heck out of it to keep a 1/2 seam allowance from slipping to a 1/16 seam allowance, 2) because it also made a very thick base for buttonholes when doubled over in the folds (see closeup photo). I actually had to take my skirt to a local shop to have the buttonholes made on a brand new Husqvarna Viking machine. Even then it took several hours of practice to find a machine that could stitch through the thick, slippery folds. Nonetheless, I have been craving a velvet skirt and I am pleased with the final product.

Pattern Alterations or any design changes you made:
An important heads up – the pattern pieces for the skirt facing and interfacing are shorter than the actual skirt, but they should be the same. Make sure you measure and make adjustments before cutting out the facing pieces. A formal correction is available on the Stitch website at http://quiltingarts.com/stitch/corrections/winter08.html.

With that said, I lined the entire skirt rather than only lining the facing area. I liked the rose print silky fabric so much, and wanted to keep the entire skirt very formal. Velvet and synthetic "silk" have so much drape that I feared the lining would flop about if not anchored to the entire skirt, so I opted for full lining. Plus, it is just so lavish and fun to have a skirt with an inside that looks as beautiful as the outside. Now I don't mind if my wrap flies up a bit or slides apart a bit as I walk or sit, in fact I welcome a bit of the lining to show more!

As mentioned in the sizing section, I also attempted to size up the skirt to meet my measurements by adding a few inches to each piece, but found it too big, so I sized back down to the XL as designed. The XL ended up fitting perfectly.

Would you sew it again? Would you recommend it to others?
Yes, and I had better sew it again. I spent at least five hours tracing the pattern from the magazine insert, resizing, adjusting, sewing the muslin, and retracing the final pattern. The actual skirt only took about an hour and a half to sew, including hemming (not including the button holes, but that a whole other story). In order to make my efforts worth the time, I BETTER sew it again!

I actually look forward to sewing this in a crisper cotton with a solid facing or lining. The cover of Stitch magazine features a grey cotton/silk blend skirt with bright yellow facing, and the color just pops. It is beautiful. This skirt needs a bold lining to highlight the design details. I am wondering if a pattern would also be fun. I have some Alexander Henry yellow and green bird fabric I have been itching to use, so it might become my new summer wrap.

Conclusion:
This is a fun and simple skirt with more personality than your average wrap. I think it works for work, dress up, and play depending on fabric. Best yet, it is a great project for beginners that offers more style than the average beginner project.


Photos courtesy of my wonderful husband. He knows how to make me look good. :) Thanks Sam!

Sunday, September 7, 2008

1930's Butterfly Blouse: Pattern Review

I truly love this pattern. I have already completed it twice, and I have fabric purchased for a third. In fact, I find myself actively restraining my urge to make it again and again and again. I think I might be happy to make at least 7 of these shirts, one for every day of the week. Why do I love it so much, you may ask? Let me count the ways: 1) It is a simple shirt to make, perfect for a beginner and a quick sew for an advanced seamstress, 2) The style is utterly vintage yet integrates very painlessly into a modern wardrobe, 3) The shirt is flattering, I imagine, for all shapes, sizes, and body types, 4) The pattern comes from Decades of Style, run by a small-business owner who is invested in resurrecting inspiring vintage patterns and making them available for ALL sewers. These are a lot of good reasons to love the pattern, and even better reasons to make multiples of this top. Below is my full pattern review.

1930's Butterfly Blouse: Pattern Review

Pattern Description:

Straight from the pattern envelope: "It is a wrap blouse with a saddle yoke at the shoulder and flowing, elbow-length sleeves. There is shirring at the shoulders in the front and ties that wrap around the back and meet at the front waist." My own ad-lib is to describe the sleeves, which are gorgeous and give the shirt its "butterfly" description. The sleeves are long (elbow-length), full, and flowy and utterly feminine and pretty.

Pattern Sizing:
The highlight of this pattern is that it comes in such a variety of sizes, from a 30" inch bust through a 46" bust. I sewed the largest size, designed for a 46" bust, 40" waist, and 49" hips. It's wrap styling allows for a flexible fit. If you like it tight, cinch the waist ties. If you like it low-cut, make a smaller size and the wrap will not overlap as much across the bust. The power is yours to create your perfect fit.

Did it look like the photo/drawing on the pattern envelope once you were done sewing it?
Absolutely. Everything about it is dead-on, include the beautiful saddle yoke and the gathering above the bust. You must choose the right material to get the same drape as the envelope, but it is totally possible. You will want a medium to lightweight fabric with a nice drape. Silk, voile, rayon, gauze and chiffon are all great.

Were the instructions easy to follow?
The instructions were very clear and easy to follow, including a diagram of each major step. The instructions also come in a 8.5x11 booklet form, rather than as a large multi-folded sheet like most commercial patterns, which I found easy to deal with in the midst of sewing chaos.

What did you particularly like or dislike about the pattern?
Likes: I ADORE the style. The sleeves on the finished garment are so dramatic, elegant, and eye catching. I think the top is very sexy, not because it is revealing, but because it is so feminine. The voluminous sleeves hint at the shapely curves of a lady without showing a lot of skin. Plus, the deep V neckline and the waist-defining sash give shape and structure to balance the volume.

This is a unique pattern. You will not find other women wearing this style, especially not in ready to wear. And I love that the pattern is available in a variety of sizes!!! All ladies deserve to wear vintage, and this pattern is so egalitarian in its sizing.

I found the directions very clear, and overall the top was quick and simple to sew. It only involves a few pieces - 5 all together including the sashes - connect by just a couple of simple seems, so it is quick and good for an advanced beginner.

Dislikes: I am very pleased and do not have dislike.

Fabric Used:
For both versions I used a very lightweight, 100% cotton, semi-sheer fabric. The first time through was a bold floral, the second time this soft, demure yellow. Both versions are finished with 1/4 cotton bias tape to finished all edges (instead of hems). Read below for my description of the bias tape modification.

Pattern Alterations or any design changes you made:
The original pattern calls for top stitching along all the bodice pieces, but after a few practice tries at top stitching, I realized I am pretty bad at straight, even, controlled top stitching and I resorted to trimming every edge with bias tape, then top stitching the bias taped finish to the edge of the other pieces. Thus, I did not have to fold a perfect 1/8 hem on the noticeable front yoke of the shirt. I am VERY pleased by the bias tape results, because I think the trim adds an extra bit of detail and sophistication.

I used tiny quarter inch biased tape, which is really, really small. It took me several feet of pinning, sewing, messing up, cursing, and starting over to devise a plan that worked better than pins. So, fellow sewers or anyone who might ever work with bias tape, here is my tip of the day: IN ORDER TO PRESERVE YOUR SANITY AND YOUR FINGERS, USE A WATER BASED GLUE STICK TO BASTE TINY BIAS TAPE ON DELICATE FABRIC. Don't use pins. Pins don't work. But glue, use it!

My yellow version of the shirt was created using significantly less fabric than the pattern calls for, so I shortened the length of each sleeve by 6 inches all around. To achieve a shortened sleeve, I traced the sleeve pattern onto a new piece of pattern paper. Using my hem gauge, I marked a dot six inches in from the pattern edge every inch or so, making sure to match the angle of the edge with my mark. I then traced the dots together, snipped the pattern shorter, and proceeded with the construction of the shirt per the standard instructions. I am pleased with the shortened sleeves, as they saved fabric and have a more "day-wear" or "work-wear" wearabilty to them, however the original long sleeves are still my favorite, and they are the way I plan to use this pattern the next time I sew it.

For the yellow version, due to lack of fabric, instead of cutting a single back piece on the fold as indicated, I converted the center back fold into a seam, added seam allowance, and cut two pieces. You can see the seem in the back photos. This worked very well, and since I used a french seam binding for my seam finish, it looks very nice in the back of the shirt. On the floral version of the shirt I cut the back as one single piece, fussy cutting to center a big floral right in the center of the back.

On my yellow shirt I also made the wrap ties extra long so they tie in back, rather than in front. Both front of back ties look great, it is nice to have variety.

Would you sew it again? Would you recommend it to others?
Yes, and I did. I have made two versions of the shirt, and I already have fabric chosen for teal blue knit to make a third. Plus, I am utterly convinced that somehow I can convert this into a wrap-dress... although I am not sure about how to do that yet. The sleeves the the saddle yoke are just so great, I would like to incorporate it into all of my wardrobe!

Conclusion:
This is a fun and simple shirt from a great pattern company. I am very loyal to Decades of Style because of the extended sizing and variety of design. I recommend this pattern to all sewers, vintage enthusiasts, plus sized sewers, beginners looking for a unique project, and basically anyone who wants a dramatic and very wearable shirt.

p.s. All photographs taken by my very talented husband Sam at the Olmos Perk Coffee Shop on McCullough in San Antonio, and in the adjoining abandoned boxcar yard. It's my new favorite coffee shop in town, their espresso is rich, bold, and authentic and the vibe in the shop is relaxed, local, and hip.

The sexy and yet subtle 1930's Butterfly Blouse, I love it so much I just want to kiss it!

Saddle yoke, gathered front, bias trimmed edges, and wrap shirt front.

The saddle yoke, flutter sleeves, and shirt back.

Friday, June 20, 2008

1948 Siren Sundress: Pattern Review

I just added another notch to my sewing bedpost! I finished my second successful dress, a Decades of Style 1948 Siren Sundress! So now I whisper to the pattern as I tuck it into my stash of finished patterns, "I have taken your Siren Sundress, and our little tryst was a pleasant one. Call if you are ever back in town, I would love to catch up." The Siren Sundress was a good mistress; simple but not boring, mailable to my needs, and the kind of dress that lingered on my mind from our first meeting as I unfolded the tissue pattern until the affair ended with the final seam. She proved a project that required some sewing ingenuity and creative problem solving due to her bodice issues, but now that I have succeed in correcting the challenge, the dress is a great source of pride for me. Who says lovers never change for a relationship?

I love the fabric pattern I used. It is actually an Ikea curtain that I purchased months ago in hopes of using it for more than home decorating. The bold, abstract leaves and the shades of green and blue on white are are unique play on a traditional summer floral. I liked the idea that the pattern serves as a contrast to the vintage style of the dress. Truthfully, now that everything is finished, I have come to realize that a lined dress in upholstery weight linen is just too warm for the San Antonio summer, but even with the pricks of perspiration pricking at my back when I wear it, I still think it looks like a lovely summer BBQ outfit.

Oddly enough, the biggest problem I faced with the dress was a problem I expected before I even began. Combining my full bust figure with the dress bodice was a little bit like entering a doomed relationship bound to fail because of incompatibility, but the chemistry was just too tempting to pass up. I thought I would be able to make it work. Unfortunately, my beginners luck faded, and no matter how long I tried I was never able to successfully redraft the bodice successfully. I spent three weeks of sewing class - mind you that is nine hours total - redrafting the pattern. I sewed three muslins in an attempt to correct the bodice fit. However, on my third redraft I realized that I had ALMOST recreated the original pattern. I was back to square one, plus an awkward extra dart. So I threw my arms up in defeat and resorted to the original tissue pattern. I led myself to believe the problem of the ill fitting bust might magically disappear in the construction of the final garment. Love would conquer all.

Love did not conquer the inevitable fit issues, but I jerry rigged a very suitable alternative, featured below and described in the pattern review even farther below. If you are interesting in the technicalities, read on. However, if you are just interested in admiring my handiwork and ingenuity visually, scroll down for a few more photos.

as posted on sewing.patternreview.com:

Pattern Description:
The 1948 Siren Sundress is a vintage-style wrap dress with a mock-wrapped bodice, v-neck, and a skirt that overlaps in the rear. The original pattern creates a backless dress (very sexy!), but I like to wear a bra so I modified the pattern for a full back. The dress is held in place with two long straps that function as both the shoulder straps and then wrap around the body to create a waist sash. Overall the dress is a very unique design that is flexible to size, easy to sew, and simple and fun to wear.

Pattern Sizing:
The highlight of this pattern is that it comes in such a variety of sizes, from a 30" inch bust through a 46" bust. I sewed the largest size, designed for a 46" bust, 40" waist, and 49" hips.

Did it look like the photo/drawing on the pattern envelope once you were done sewing it?
The dress looks very much like the pattern, excluding the modifications I made. However, the straps are not as wide. The pattern came with notation that during the pattern resizing, the Decades of Style owner felt like the straps on her final garment were too wide, so she narrowed them on the pattern. Therefore the straps on my finished garment were narrower than in the patter illustration. However, this can easily be modified and increased when cutting your strap fabric by adding a few more inches.

Were the instructions easy to follow?
The instructions were very clear and easy to follow, including a diagram of each major step. The instructions also come in a 8.5x11 booklet form, rather than as a large multi-folded sheet like most commercial patterns, which I found easy to deal with in the midst of sewing chaos.

What did you particularly like or dislike about the pattern?
Likes: Most of all, I love that the pattern is available in a variety of sizes!!! All ladies deserve to wear vintage dresses, and this pattern is so egalitarian in its sizing. The garment can also be simply re-sized to accommodate a non-standard body proportion, for example a narrow chest and large hips, or a wide waist and narrow hips.

I found the directions very clear, and overall the dress was very simple to sew. It only involves ten pieces plus the lining, so it is quick and good for an advanced beginner.

I also like that the full skirt is attached at the waist with NO GATHERS, to create very slimming and streamline silhouette. It also means the skirt was easy to attach.

Dislikes: My biggest challenge was that the dress is not well proportioned for a large bust (this is not a new problem for me!). The dress includes one side dart to help the bodice fit a woman's curves, but for me the dart was too shallow to create a form fitting wrap. I was left with excess fabric gaping around my breasts. You can find images of the dress prior to modification on my blog here. I made some changes with the front styling to help create a more form-fitting bodice, and overall I am very pleased with the final product.

Fabric Used:
I used an Ikea Stockholm Blad curtain in Green, made of linen. I used the white curtain lining made of 100% cotton for the dress lining. Overall, I love the large abstract print for the dress, but because the fabric is upholstery weight, it just a little too heavy and thick. I don't think it has the correct texture to drape around the body ideally.

Additionally, I used a very stiff interfacing to line the back of the dress, which ended up being too stiff. Stiff interfacing might still be a good choice for the backless version of the dress, to help give the garment more structure. However, in my modified larger back piece, the interfacing just makes the dress feel like cardboard.

If I make this dress again, I plan to use a lightweight cotton, maybe a period-appropriate novelty print, or something with a more fluid drape. I think it would be beautiful to make this dress in a colored eyelet, with a bright color as the lining, maybe navy eyelet with sunny yellow lining. The skirt would also need lined if sewn using eyelet. On a thin and fit person, this dress would also look hot, and very modern in a cotton jersey knit.

Pattern Alterations or any design changes you made:
I created a full back using the original back pattern as my guide. Instead of tapering the back to a point at the center base of the back as the original pattern suggests (and the pattern illustration shows), I just extended the line from the armpit out in a straight line parallel to the base of the piece. I made a cut from the original lower corner to my new upper line, and viola, I essentially created a long rectangular piece, (rather than the original triangle). Thus, I was able to overlap each rectangle to create a back suitable for strapless bra coverage.

I increased the length of the shoulder straps/waist sash. I have a 40" waist, and the length offered on the pattern was too short to tie a pretty knot as a finish. I added at least another 18" inches. The garment is a bit unwieldy off the body, because the straps are soooooo long and hard to fold or hang, but they look great on the body.

I also lined the straps, which the pattern does not call for. This was originally a mistake on my part. I cut and sewed the lining before I realized the straps were not intended to be lined. However, it was a happy mistake, because the lining looks nice. One word of caution when lining the straps, however, is that the lining will make the straps more stiff, which makes them ever so slightly more awkward to wrap beautifully. You may want to experiment depending on your material and how ugly the backside of your fabric is.

Lastly, and perhaps most importantly, I dealt with an ill-fitting bodice by sliding a tube of ribbon around each should strap at the base of the strap, just above each breast. By gathering the fabric into a clump here, I was able to corral in in the extra fabric fullness that gaped. The knotting also had the pleasant effect of creating a semi-sweetheart neckline that simultaneously covers more of my breast and still exposes more skin on my chest and shoulders. It is probably not the most elegant solution to my gap-age problem, but a very effective and satisfying solution in line with my experience level.

Would you sew it again? Would you recommend it to others?
I would BOTH sew the dress again and recommend it to other. I think the dress would be particularly stunning in its backless form, and I would love to know if anyone completes this look with sewn-in bust support, and how.

Conclusion:
This is a fun dress from a great pattern company. I am very loyal to Decades of Style because of the extended sizing. However if you are a larger gal with a figure that deviates from the proportional B-cup bust that most patterns use as the baseline guide, than you might want to think through some pattern modifications to create a better fit before you start. Surely, there must be some way to dart or tuck the bodice to create a well-fitting faux-wrap. Overall, it is a fun pattern that can be made many times over for easy, breezy, UNIQUE summer dresses.