Showing posts with label baking. Show all posts

Sunday, July 31, 2011

So the jet lagged make pretzels.

Returning from Europe has given me a bit of jet lag. We arrived Friday night at midnight after 20 long hours of travel, but I still woke up at 7:30 a.m. Saturday. This morning, I woke up at 4 a.m., went back to sleep for a bit, then woke up again at 6:30. I figured hey, if I'm up then I'm up, why not do something fun? So in memory of the trip to Germany, I mixed up Alton Brown's soft pretzel recipe. Then I began sorting Germany pictures while the dough rose.

By the end of the morning I will have photos of the trip posted to the blog, plus the smell of baking soft pretzels throughout the house to add ambiance to the effort. And if I am extra lucky, tonight my husband and I will break out our souvenir 1 liter beer mugs from the Hofbräuhaus and sip on some suds while we snack on pretzels and reminisce. As they say in Germany, "Guten Appetit.'

Homemade Soft Pretzels
Recipe courtesy Alton Brown

Ingredients:
1 1/2 cups warm (110 to 115 degrees F) water
1 tablespoon sugar
2 teaspoons kosher salt
1 package active dry yeast
22 ounces all-purpose flour, approximately 4 1/2 cups
2 ounces unsalted butter, melted
Vegetable oil, for pan
10 cups water
2/3 cup baking soda
1 large egg yolk beaten with 1 tablespoon water
Pretzel salt

Directions:
Combine the water, sugar and kosher salt in the bowl of a stand mixer and sprinkle the yeast on top. Allow to sit for 5 minutes or until the mixture begins to foam. Add the flour and butter and, using the dough hook attachment, mix on low speed until well combined. Change to medium speed and knead until the dough is smooth and pulls away from the side of the bowl, approximately 4 to 5 minutes. Remove the dough from the bowl, clean the bowl and then oil it well with vegetable oil. Return the dough to the bowl, cover with plastic wrap and sit in a warm place for approximately 50 to 55 minutes or until the dough has doubled in size.

Preheat the oven to 450 degrees F. Line 2 half-sheet pans with parchment paper and lightly brush with the vegetable oil. Set aside.

Bring the 10 cups of water and the baking soda to a rolling boil in an 8-quart saucepan or roasting pan.

In the meantime, turn the dough out onto a slightly oiled work surface and divide into 8 equal pieces. Roll out each piece of dough into a 24-inch rope. Make a U-shape with the rope, holding the ends of the rope, cross them over each other and press onto the bottom of the U in order to form the shape of a pretzel. Place onto the parchment-lined half sheet pan.

Place the pretzels into the boiling water, 1 by 1, for 30 seconds. Remove them from the water using a large flat spatula. Return to the half sheet pan, brush the top of each pretzel with the beaten egg yolk and water mixture and sprinkle with the pretzel salt. Bake until dark golden brown in color, approximately 12 to 14 minutes. Transfer to a cooling rack for at least 5 minutes before serving.

Thursday, November 11, 2010

Lamb ragu, and an almond tart for YOU!

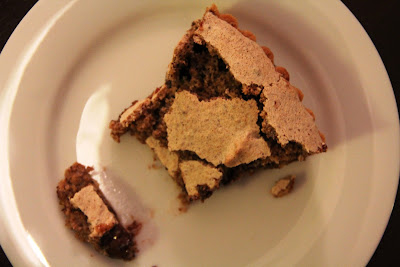
Enough sewing already. Sometimes a girl's gotta eat. And sometimes when she eat,s she cooks a three-course meal for her friends from her new Mario Batali cookbook. And if she and the rest of the eaters are lucky, they end their eating with a big piece of dessert. This dessert is a Crostata alle Mandorle, also known as an almond tart. It combines almond, apricot jam and chocolate, and that is why it is good.

I asked my friend Lauren as we ate the tart if she thought it might count as healthy, since it is packed full of almonds, and (raw) almonds are one of those high fiber, high protein super foods. She responded "No, and you wanna know how I know that?...Because this tastes GOOD." She is right. Things that tastes good like this tart are probably never as healthy as your mid-morning snack of 6 raw almonds. That would just be too good to be true.

It was fun to make, because 1) I got to knead the tart dough, which is such a luxury. I am used to dough that should be touched as little as possible to prevent toughness, which always gives me anxiety (Think "Ahhhh! did I overwork the dough, have I ruined the dessert?!? Gahhh!!!). And 2) because I got to beat egg whites with sugar until glossy stiff peaks. It was beautiful, a wonderful texture, and tasted good. I don't get to beat egg whites often.

The recipe involves using both a food processor AND the stand mixer, so it is a bit heavy on counter space and dishes, but other than that I found it very simple. I sliced it very warm, and it did not hold together as firmly as I imagine a tart should, but after cooling it seemed to have a more solid body. The jam is a bit acidic, which balances some of the sweet, and little bits of chocolate throughout add a nice, satisfying cocoa fix that we all look for in a desert, without being too rich. I fully expect to add this to the dessert files to be made again, preferably after a hearty lamb ragu.

Almond Tart: Crostata alle Mandorle
from Mario Batali's

Ingredients
4 ounces (1 stick) unsalted butter, plus more for pan
1 3/4 cups all-purpose flour
1/2 cup ground toasted almonds, plus 2 cups
1/2 cup sugar
1 egg, plus 3 egg whites, plus 1 egg beaten
Salt
1/2 cup apricot jam
1/2 cup semisweet chocolate, finely chopped

Directions
Butter the bottom and sides of a 9-inch tart pan with a removable bottom and set aside.

Toss together the flour, 1/2 cup almonds, and sugar. Cut the butter into the dry mixture until it is the consistency of fine bread crumbs. Add 1 egg and a pinch of salt and mix well, kneading slightly. Form the pastry into a ball, wrap in plastic wrap, and refrigerate 30 minutes.

Roll out the dough to 1/8-inch thickness. Line the tart pan with the dough, letting it hang over by 1-inch. Trim the edges, reserving the scraps and rolling them into a ball. Place the pan in the refrigerator for 30 minutes.

Preheat the oven to 375 degrees F.

Line the tart pan with waxed paper and load the inside with beans. Bake in the oven until the dough has firmed but is still pale about 20 minutes. Remove from the oven and set aside.

Beat the egg whites until they are thick and glossy. Spread the apricot jam in an even layer inside the tart crust. Fold the remaining almonds and the chocolate into the whipped egg whites and spread this mixture over the apricot jam. Bake 30 minutes. Serve warm or room temperature.

This is the ultimate juxtaposition. Four pounds of broccoli being washed for dinner, while I beat in a cup of sugar into egg whites. At least we ate a semi-balanced meal.

Tuesday, May 18, 2010

It's about the journey, and of course the banana bread.

I know what some of you may be thinking "Enough already with the Hawaii, it's been three weeks, let it go." But people, Maui is not just something you can let go and just toss to the side when it is over and done. It lingers on the mind with little teasing memories of fun in the sun, surf, and jungle. And that is why I continue making every effort to instill a little bit of Maui in my everyday.

An easy way to do this is Banana Bread. In Hawaii, banana bread is everywhere, sold at tiny little roadside stands just off of winding, one-lane roads. They are the kinds of places where you can just imagine bananas being harvested from trees in the backyard, picked by husbands and school-aged sons, to be baked into warm, delicious loaves by mothers and grandmothers and sisters together in a tiny kitchen. It is homemade and delicious.

The road to Hana is a hallmark of Maui. The road is a narrow, curvy route to a remote corner of the island, and the journey is the dotted with all things wonderful, magical, and kind - flower stands and fruit stands, waterfalls, bamboo forests, tropical flowers, tiny towns of Hawaiian natives, and of course small shacks selling homemade banana bread.

One of the best loaves of banana bread came from the most remote and tiny of towns on the road to Hana, from a place called Keanae. Keanae is a miniature community on one of the most graceful little peninsulas in all of the Pacific. To reach the banana bread, you drive past little houses and tiny family farm plots, with either side surrounded not far away by menacing black lava formations with pounding, spraying surf on either side. The waves on the rock are what make Keanae feel so special - the little community feels like it floats amid a deep and powerful sea, protected on three sides by harsh and menacing waves. But the community itself is warm and welcoming, dry and cozy, and green and soft and safe, as though the ocean respects its tiny plot and knows exactly where to stop.

We sat for a while on the edge of the rocks, munching our banana bread and sitting eye level with the crashing waves. The weather was cool, the sky was gray and mottled with clouds, and the waves crashed with abandon in a thousand shades of turquoise, gray, and white. I could have stayed for a long time, resting and relaxing, watching, and waiting for nothing in particular. I think in that moment I found the joy in the journey and the spirit of the Road to Hana.

On the drive to Hana the guidebooks encourage drivers to practice aloha by allowing faster cars to pass and sharing the road. I recommend another way to practice aloha, by sharing banana bread. So upon my return I baked up several loaves for eating and sharing. In an effort to cram all things Hawaiian into this bread, I choose a recipe with both bananas and coconut, and I took it a step further and crumbled macadamia nuts over the top. The results are delicious. The bread might not transport you physically to the little town of Keanae on the Road to Hana, but it will hopefully give you a little taste of the good life, and inspire a little aloha in your day.


Banana-Coconut Bread
Adapted from Orangette, who adapted it from HomeBaking: The Artful Mix of Flour and Tradition around the World, by Jeffrey Alford and Naomi Duguid

About 3 large, overripe bananas
2 cups unbleached all-purpose flour
¾ tsp. baking soda
½ tsp. freshly grated nutmeg
Pinch of salt
1 stick (4 ounces) unsalted butter, at room temperature
1 cup granulated sugar
1/8 tsp distilled white vinegar
1 ½ Tbsp. dark rum
½ cup dried shredded unsweetened coconut
1 Tbsp. demerara or dark brown sugar

Preheat the oven to 350 degrees Fahrenheit. Butter a standard-size loaf pan.

In a blender or food processor, purée the bananas. Measure out 1 ½ cups of purée. [If you have more than that, try stirring the excess into some plain yogurt. It’s delicious.] Set the purée aside.

In a medium bowl, whisk together the flour, baking soda, nutmeg, and salt. Set aside.

In a large bowl (or the bowl of a stand mixer), beat together the butter and sugar until light and fluffy. Add the vinegar and rum, and beat to mix well. Add the banana purée and the flour mixture alternately, about 1 cup at a time, beginning with the banana and beating to just incorporate. Use a spatula to fold in any flour that has not been absorbed, and stir in the coconut. Do not overmix.

Scrape the batter – it will be thick – into the prepared pan. Smooth the top, and sprinkle evenly with the demerara sugar. Bake for 50-65 minutes, or until the top is nicely browned and a toothpick inserted in the center comes out clean. Let cool on a wire rack for about 20 minutes; then turn the loaf out of the pan and allow it to cool completely.

This loaf will keep, sealed airtight, for three to four days, although it is best, I think, on the second day.

Friday, April 16, 2010

The Strawberry Shortcake tradition lives.


Growing up, once every spring my sisters and I would be called to dinner to find heaping plates of strawberry shortcake being served... and it was DINNER. Not a snack, not dessert, but a whole heaping plate of strawberry shortcake as the entree of the night. It was the best night of the year!

Now, Sam and I keep the tradition alive in our own house. I brought the tradition back shortly after college, first with Sam and our friend Will, when years ago we each ate a strawberry shortcake the size of dinner plates until we were so full we all laid on the apartment floor moaning. Now, we serve the sweet treat dinner once a year to our faithful dinner club. Of course, Casey is deathly allergic to strawberries, so she usually gets blackberry shortcake.

I won't lie, shortcake for dinner is not for the faint of heart (or rather faint of stomach), but only for the hearty who can handle a large quantity of sweet, fatty, tastiness the size of a doubled patty hamburger, but without any meat and potatoes as a starting act. In my earlier years I used the great Bisquick boxed shortbread mix, but these days I have found an even better from scratch alternative. This recipe is sweet but not cloying, and the citrus really perks up the berries. For six dinner portions, I doubled the recipe and formed teh dough into six large, handformed biscuits. They took about 30 minuts to bake, and they were so big nobody could finish. But of course the gluttenous excess is part of the charm of this dinner, so don't decrease the biscuit size too much!

I also douse my strawberries with some Grand Marnier for extra citrus flavor. A little liquor really emboldens the flavor of the berries and makes the juicy and sweet. And of course the whipped cream must be only lightly sugared, adn always, ALWAYS the real deal. No canned or tubbed whipped cream will do.

Since strawberry season is in full force, with berries on special at every market for only a few bucks per clam shell, I highly recommend you surprise your families with your own shortcake dinner this evening. I promise it will become a tradtion you want to carry forth.

Lemon Shortcake - for Strawberry Shortcakes
Epicurious | August 2006

Ingredients:
  • 2 cups all-purpose flour
  • 2 cups cake flour
  • 1/2 cup sugar, plus more for sprinkling
  • 2 tablespoons baking powder
  • Pinch (1/16 teaspoon) kosher salt
  • 1/2 cup cold butter (1 stick), cut into chunks
  • 1 cup well-shaken buttermilk
  • 1/2 cup cream, plus more for brushing
  • Finely grated zest from one lemon
  • Finely grated zest from one orange
Directions:

In large bowl, sift together all-purpose and cake flours, sugar, baking powder, and salt. Use pastry cutter or fork to blend in butter until mixture resembles coarse meal.

In medium bowl, whisk together buttermilk and cream, then whisk in lemon zest. Add liquid mixture to dry mixture, stirring with fork just until dough forms.

Turn dough out onto floured work surface and knead gently just until dough holds together, about 10 turns. Place dough on plate, cover with plastic wrap, and refrigerate until well chilled, at least 30 minutes.

Preheat oven to 400°F.

On floured work surface, pat out dough to 1/2-inch-thick round. Using 3-inch cutter, cut out biscuits. Transfer to ungreased baking sheet, brush lightly with cream, and sprinkle with sugar. Bake until golden brown, 15 to 18 minutes, then transfer to rack to cool.

Wednesday, December 30, 2009

Christmas cookies redeemed.

Sam and I spent Christmas in San Antonio with just the two of us for company, which was wonderful and calm and relaxing. Except for one thing. On Christmas Eve there was a definite lack of Christmas cookies in our house. With only two of us, I refrained from much baking this year. After all, the two of us alone hardly needed tins upon tins of sweets. But, at 7 p.m. on Christmas Eve, I just felt like something was missing. It wasn't that I was lonely, but I was worried about having an empty plate for Santa. So I baked cookies.

In fact, I baked two batches of cookies. At least I restrained myself from doubling the batches. The first was an old classic and family favorite known as Russian Tea Cakes, or Mexican Wedding Cookies, or even sometimes butterballs (due to the excessive and delicious butter content). The second cookies was a new recipe, not designed especially for Christmas, but it has become my new favorite Christmas cookie. It is orange shortbread sandwiched together with chocolate ganache. Yum.

I like to focus on citrus for Christmas. It reminds me of Little House on the Prairie. During their Christmas on the cold plains, both girls get an orange in their stocking, and it is such a treat during that winter in their little house on that big, cold prairie. These days we all take our citrus for granted. But just think, little Laura and Mary each received one orange, which they cherished section by section. At my house we currently have a five pound box of Mandarin cuties, and I peel three or four a day if I feel like it (no scurvy here!). And their oranges were not even genetically modified to eliminate seeds!

The cookies are minimally sweet, rich with the ganache, and have a heft that makes you feel like one is enough. The orange provides a sweet scent and a demure, delicate flavor that compliments the chocolate filling. The sandwiches are also sturdy with a good shelf life, which makes them a great choice for the holidays. You can easily whip up a triple batch to package for friends and family without fear of spoilage or crumbs. We ate ours up to a week after baking, and it was only at day nine that they lost their luster. You could also make the dough alone as single cookies, sprinkled with sugar and served up with tea or wassail or just a cold glass of milk.

Next Christmas Sam and I may find ourselves surrounded by family, or with friends, or again sharing each others quiet, lovely company along. But no matter who we spend it with, there will be homemade sweets and this cookie. And every time I eat it I will remember Little House on the Prairie, and the simple pleasures in life, like citrus and a warm home on a cold night and a family that cares whether near or far. They are simple pleasures that should not be taken for granted. So, until next year, happy holidays and good luck with the New Years Resolutions.


Orange Shortbread Cookies
modified from Bon Appetit, with the addition of chocolate ganache for sandwiches

1 1/2 cups all purpose flour
1/2 teaspoon baking powder
1/2 teaspoon salt
1/2 cup (1 stick) unsalted butter, room temperature
1/2 cup sugar
2 teaspoons (packed) grated orange peel
1/2 teaspoon orange extract
1 large egg yolk
3 tablespoons whipping cream

Position rack in center of oven; preheat to 350°F. Butter and flour large baking sheet. Whisk first 3 ingredients in medium bowl. Beat butter, sugar, orange peel, and orange extract in large bowl until fluffy. Beat in yolk, then cream. Add flour mixture; beat until dough comes together in moist clumps.

Gently roll dough out to ½ inch sheet and cut circle using biscuit cutter. Place on baking sheet, spacing 3/4 inch apart. Bake cookies until golden, about 18 minutes. Transfer to rack; cool.

When ganache is cool and think, spread generously on cookies and gently sandwich together. Pack into cute Christmas tins if desired and deliver to friends and family (recommended).


Chocolate Ganache Filling

1 1/2 cups (12 fluid ounces or 360 milliliters) heavy cream
1 lb (454 grams) semisweet or bittersweet dark chocolate

In a heavy saucepan, boil heavy cream. Turn off the heat. Add chopped chocolate pieces and let it rest until melted. Use a rubber spatula to stir the mixture until all the pieces are melted.

Pour it into a room-temperature bowl and cover with plastic wrap. Refrigerate the frosting until thick but still spreadable. Fill cookies and enjoy.

Tuesday, December 22, 2009

My punishment for cheating.

Yes, I admit it. I cheated. I bought Pillsbury sugar cookie dough in an attempt to shortcut the sugar cookie experience. I suck, I know. But if it makes you feel any better, I paid a steep price for my cheat.

Beyond the guilt and shame, my punishment is the challenge of trying to deal with these ridiculous, shapeless Christmas cookies. You probably cannot tell from looking, but those are bells, trees, stars (yes, stars!) and a pair of snowmen engaged in what looks to be an inappropriate act of passion.

Usually, almost always, like 98% of the time, I bake from scratch. Especially with my Christmas cookies. In my house growing up, we have a long tradition of decorating dozens upon dozen upon dozens of homemade Christmas cookies. The cookies are buttery and light and melt in your mouth and delicious, and always because they are made from scratch. So, I guess I deserve these horrible shapes for deviating from tradition.

Next time, I will bake from scratch. I promise.

Tuesday, December 8, 2009

The great miracle of yeast.


Working with yeast makes me feel like a miracle worker. Seriously, it is as close as I get to achieving what a farmer achieves in a growing season. You start from seed with the dry yeast, plant the crop by incorporating the yeast into a dough, cultivate the yeast with careful tending over a period of time as it rises, deflates, and re-rises , monitor the crop's susceptibility to environmental disaster by keeping it in a warm, moist area, and finally you harvest the final, bountiful crop from a warm oven. Of course, unlike a farmer, my crop offers more immediate gratification. Sure, my Thanksgiving brioche took a good 16 hours from start to finish, but it was significantly faster than the summer growing season.

I used my Kitchenaid stand mixer for this decadent roll, following the instructions of Dorie Greenspan from a Fall Bon Appetit issue. Ms. Greenspan wrote about the dough with such affection, and combined with her no-nonsense, "You can do it" attitude, I could not resist.

Sam and I developed a bit of an ego as we baked. It was as though the rolls rose in proportion to our pride. With every step of home baked bread recipe, we felt increasingly proud of our efforts. And of course, with every step of the creation, the yeasty rolls just rose and rose, as though our own self confidence and ego were propelling the rise rather than the yeast. After all, how often does anyone home bake bread these days? Not often. But we did!

The best bites were straight out of the oven, almost too hot to touch, and steaming. They rolls lost luster with age, so please do not restrain yourself around a fresh baked batch. No matter that we were on our way to Thanksgiving dinner right after they baked, I still wish I had eaten two. By the time they hit the table they could have stood for a bit of butter or jam, and on the second day the rolls were in the dry phase, primed and ready for french toast or bread pudding. I never could bring myself to slather them in butter, even the day-old dry leftovers, given the lavish stick and a half in the recipe. But maybe I should have. After all, a bit of brioche is a shame to waste on anything less than perfection.


Bubble-Top Brioches
from Bon Appétit, October 2009 by Dorie Greenspan

1/4 cup warm water (110°F to 115°F)
1/4 cup warm whole milk (110°F to 115°F)
3 teaspoons active dry yeast (measured from two 1/4-ounce envelopes)
2 3/4 cups all purpose flour
1 1/2 teaspoons salt
3 large eggs, room temperature
3 tablespoons sugar
12 tablespoons (1 1/2 sticks) unsalted butter, room temperature
1 large egg beaten to blend with 1 teaspoon water (for glaze)

Combine 1/4 cup warm water and warm milk in bowl of heavy-duty mixer fitted with paddle attachment. Sprinkle yeast over and stir to moisten evenly. Let stand until yeast dissolves, stirring occasionally, about 8 minutes.

Add flour and salt to yeast mixture. Blend at medium-low speed until shaggy lumps form, scraping down sides of bowl occasionally, 1 to 2 minutes. Add eggs, 1 at a time, beating until blended after each addition. Beat in sugar. Increase mixer speed to medium; beat until dough is smooth, about 3 minutes.

Reduce speed to low. Add butter, 1 tablespoon at a time, beating until blended after each addition, about 4 minutes (dough will be soft and silky). Increase speed to medium-high and beat until dough pulls away from sides of bowl and climbs paddle, 8 to 9 minutes.

Lightly butter large bowl. Scrape dough into bowl. Cover bowl with plastic wrap. Let dough rise in warm draft-free area until almost doubled in volume, about 1 hour 15 minutes to 1 hour 30 minutes.

Gently deflate dough by lifting around edges, then letting dough fall back into bowl, turning bowl and repeating as needed. Cover bowl tightly with plastic wrap and chill, deflating dough in same way every 30 minutes until dough stops rising, about 2 hours. Chill overnight. (At this point, use the dough to make 12 brioches, or 6 brioches and 1 tart, or 2 tarts.)

Butter 12 standard (1/3-cup) muffin cups. Divide dough into 12 equal pieces; cut each piece into thirds. Roll each small piece between palms into ball. Place 3 balls in each prepared cup (dough will fill cup). Place muffin pan in warm draft-free area; lay sheet of waxed paper over. Let dough rise until light and almost doubled (dough will rise 1/2 inch to 1 inch above top rim of muffin cups), 50 to 60 minutes.

Position rack in center of oven and preheat to 400°F. Place muffin pan on rimmed baking sheet. Gently brush egg glaze over risen dough, being careful that glaze does not drip between dough and pan (which can prevent full expansion in oven). Bake brioches until golden brown, covering with foil if browning too quickly, about 20 minutes. Transfer pan to rack. Cool 10 minutes. Remove brioches from pan. Serve warm or at room temperature.

Tuesday, August 4, 2009

Cake Balls.


In addition to bread and cheese on the patio, my fourth of July weekend in Colorado also involved a foray into the world of weird dessert baking, when my sister Anne and I undertook the blogtastic "cake ball" recipe that has been sweeping the Internet this year. Cake balls are odd little things, but strange in a tasty way. They are essentially the amalgamation of a good bite of cake, but all squished up into a bite sized package. In fact, cake balls are so ball-y that in a way it is almost as thought the cake has been pre-chewed for you. Yeah, I know that is not appetizing, but that is what I mean when I say that the cake balls are both odd and tasty. The little desserts were almost too moist, but at the same time they are full of frosting and covered in chocolate, so they can't be that weird. Also, they remind me of something a 1960's stay at home housewife would make to bide her time before her cocktail-hour martini, in anticipation of guests. It just has that casserole-and-jello-salad-era nostalgia to it. But maybe that's just me.

Most cake ball recipes you will find on the Internet call for a boxed cake mix and a can of frosting from the grocery aisle. To that I say, don't go there people. Don't even think about going there. Cake is simple, frosting is even easier, so do it from scratch. I put two good recipes below for your ease of baking.

And once the cake and frosting is out of the way, making the cake ball is, well, a piece of cake. Just bake a cake and let it cool. Whip up a batch of frosting. Then use a fork and break the sheet cake into crumbs and large chunks. Stir into frosting until combined. Using your hands or a cookie dough scoop, portion bite sized balls of cake mixture onto a baking sheet or plate and refrigerate or freeze until firm. The next step is where you can get creative. Dip the cake balls in melted chocolate or white chocolate. If you are fancy and experienced in candy-dipping, you might consider adding a bit of food-safe wax or shortening to help the chocolate coating dry smoothly like a truffle. You can top with sprinkles, nuts, candies, confectioners sugar, and even lollipop sticks.

When dipped, cool, arrange gracefully on a tray, put on your best string of pearls and your crisp hand-sewn apron, and serve. Preferably to yourself, bon-bon style. Enjoy.


One-bowl Chocolate Cake
from a Martha Stewart cupcake recipe

Ingredients:
3/4 cup unsweetened cocoa powder
1 1/2 cups all-purpose flour
1 1/2 cups sugar
1 1/2 teaspoons baking soda
3/4 teaspoon baking powder
3/4 teaspoon salt
2 large eggs
3/4 cup warm water
3/4 cup buttermilk
3 tablespoons safflower oil
1 teaspoon pure vanilla extract

Directions:
Preheat oven to 350 degrees. Line standard muffin tins with paper liners; set aside. Sift together cocoa powder, flour, sugar, baking soda, baking powder, and salt into a large bowl. Add eggs, warm water, buttermilk, oil, and vanilla, and mix until smooth, about 3 minutes. Scrape down the sides and bottom of bowl to assure batter is well mixed.

Divide batter evenly among muffin cups, filling each 2/3 full. Bake until tops spring back when touched, about 20 minutes, rotating pan once if needed. Transfer to a wire rack; let cool completely.

Cream Cheese Frosting

Ingredients:
2 (8 ounce) packages cream cheese, softened
1/2 cup butter, softened
2 cups sifted confectioners' sugar
1 teaspoon vanilla extract

Directions:
In a medium bowl, cream together the cream cheese and butter until creamy. Mix in the vanilla, then gradually stir in the confectioners' sugar. Store in the refrigerator after use.

Monday, May 11, 2009

Most certainly not Martha.

Nothing puts you in your place in the kitchen quite like botching a Martha Stewart recipe.

I love her Baking Handbook because of its clear organization, detailed how-to instructions, and most of all because of the gorgeous design and photography. You can see her book propped up in the photos above, all of her hand pies sitting their with their symmetrical, identical and goldened to perfection corners tucked neatly to the center. Um, yeah, it's perfection.

Then you see my hand pies. They are most certainly NOT symmetrical, they are definitely not identical. Many of them are more than golden, and nothing is neatly tucked to the center. My hand pies likely tasted very similar to Martha's, but they lack the visual perfection. This has a lot to do with my botched crust.

I need to find a "working with Pate Brisee" self help book, because I am just not good at it. It is sort of disturbing, because I come from a lineage of successful crust makers. My grandmother bakes apple pies in a giant, foot wide, deep dish pie plate. My father can whip up a flaky, tender, perfectly golden pie crust in his sleep using shortening, which is why he frequently bakes pies for my mom on a whim. My sister Anne must have acquired the gene for crust making, only she uses butter to make a legit pate brisee. Me though, I have not perfect the crust making, although I am trying. I won't lie though, on occasion my failed attempts at crust have left me crying in the kitchen. What's a girl to do when she strives for Martha-like perfect and ends up with hand pies that look like these?

The only thing to do is take some funny photos and enjoy them as though they look perfect. After all, they still taste good, right? Plus I have heard that it all looks the same after it's chewed anyways. And worrying about my pate brisee does not help the situation. As my dad always says "Don't worry, worry ruins the crust."

Sausage-Fennel Hand Pies (from Martha Stewart's Baking Handbook)

1/4 c EVOO (optional)
1 pound sweet italian sausage, casings removed
1 large onion, thinly sliced
1 small head fennel (about 1 pound), trimmed, cored, thinly sliced
1/2 tsp crushed red pepper flakes
salt and pepper
6 plum tomatoes, quartered, seeded, and cut into 1/2-inch dice
8 oz. feta cheese, crumbled
pate brisee (see below)
1 large egg, lightly beaten, 3 T fennel seeds, lightly toasted

1. Heat 2 T oil in a large skillet over medium heat (no need if you have a non-stick pan as the sausage will release oil). Crumble sausage into pan and cook until browned, 4 minutes. Transfer to a paper-towel lined plate.
2. If needed, add more oil--depending on your sausage, you may not need any. Add the onion and cook 2 minutes (or a tad longer if you like your onion really soft). Add fennel and red pepper flakes, season with S&P. Cook, stirring occasionally, until everything is tender, 8 minutes. Add tomatoes and cook, stirring, until they release their juices, 3-4 minutes. Add reserved sausage. Remove from heat and let cool COMPLETELY. This is a good time to roll out the crust. When the filling is cooled, add feta and stir in.
3. Preheat oven to 425 degrees. Line a large baking sheet with tin foil. Now roll out 12 5x5 squares of dough from the pate brisee recipe (below). You can do this a lot of ways. I divided my dough into 3 pieces and made 4 squares out of each piece, rolling everything out between wax paper.
4. Put 1/2 c filling in the middle of each square, and then fold the corners up to cover it (shouldn't be completely sealed or anything). Lay them out on the baking sheet--they don't rise so I was able to fit all 12 on my sheet (admittedly it's an extra large sized one).
5. Brush tops with egg and sprinkle on fennel seeds. Bake until golden brown, 40 minutes (actually less in my oven). Cool slightly and serve warm.

Pate Brisee

2 1/2 c flour
1 tsp salt
2 sticks cold butter, cut into small pieces
1/4 c ice water

Combine the flour and salt in a food processor. Add butter and pulse until mixture resembles course crumbs. While machine is running, add ice water slowly until dough just holds together without being wet or sticky. You might need to add a little more water depending on how humid it is. Then chill the dough at least 1 hour or overnight.

Thursday, April 23, 2009

You CAN have your cake, and eat two.

My poor puns aside, I have to say that whoever once said "you can't have your cake and eat it too" obviously did not celebrate birthdays in our house. In our house on birthdays, we make enough cake to both have AND eat large slices of, without fear of shortage. This is because I like to bake, and I love my husband, and this means I gladly bake him multiple cakes on his special day. Last year it was a carrot cake and a Guinness Stout Cake, and this year was equally lavish with cake.

This year for Sam's birthday we celebrated with a duet of cakes, starting first with our new birthday favorite, the coconut cake which we ate with friends at his birthday party, and then moving into the tried and true classic from my childhood, the Colorado Cache Chocolate Fudge Cake, which we had on his actual birthday (and as leftovers for many days after).

I remember this cake fondly. My mother baked it for almost every birthday growign up. As children we were always allowed to choose our cake flavor on our birthdays, and almost everyone choose this cake year after year. She would bake it in a square pan, because we loved frosting and always relished the corner pieces, and a square pan ensures four corner pieces (for four daughters) and lots of edge pieces ripe with frosting. For summer birthdays the cake was always adorned with roses from the backyard garden.

One year our dog Bo jumped up on the counter and ate a large portion of my mom's birthday cake off of the cake plate. I have rarely seen my dad so angry. First, he was livid that the dog ruined my mom's cake, and second, he was upset because dogs and chocolate equal an expensive vet bill. Since chocolate is poisonous to dogs, my dad called the vet for a quick remedy. As luck would have it, the home remedy for preventing chocolate poisoning in dogs also gave my dad an opportunity to extract some deserving punishment on Bo. Thus we all discovered that two tablespoons of salt dumped down the back of a dog's throat, followed by holding the dog's muzzle closed to ensure he swallows, is an excellent way to induce dog vomiting (and thus extract the poisonous chocolate). I have never seen a dog retch as much as poor Bo on the fateful night. But then again, he did kind of deserved it for eating the cake off the counter, and the retching probably saved his life.

And, just in case you are wondering, we ate the cake anyway. My father sawed off the dog-infested portions of the cake and refrosted it a la Food Network's Ace of Cakes show. We ended up with an oddly tiered, sort of lopsided, and definately unique cake for my Mom, but we coudlnt' waste the remaining good parts. The cake was that important as a birthday tradition in our house.

I like this cake and was delighted to bring it into my own adult life as a birthday tradition this year for Sam. The cake has many merits, most of all as a vehicle for an excellent frosting. I must admit thought that I do differ with its self proclaimed "chocolate fudge" title. The cake is certainly chocolate, but it is nothing like fudge. Perhaps the frosting is what pushes it into this category? Any way you name it though, this is a good cake. Keep it away from your dog, and don't forget to serve it with heaping scoops of vanilla ice cream. Happy birthday dear Sam.

Colorado Cache Chocolate Fudge Cake

This cake was a classic during my childhood for birthdays. It bakes into a light, spongy, airy cake with an almost chewy crumb. It is the perfect vehicle for a good frosting, as it is not too dense, not too rich, but certainly stout enough to hold up to a heavy slathering of chocolate butter cream. The secret of this cake is the boiling water. I don't know what it does, but it give the cake its unique and memorable texture. Take note that the batter will be very runny after you add the boiling water, far more runny than you would expect from cake batter, but that’s part of the secret. Don’t stress, just put it in the oven and bake.

Also, this is a particularly delicious chocolate frosting with different recipe than your usual buttercream. You might consider one and one fourthing the recipe to give you enough for a very thick frost. See the below photo for proportions, courtesy of my mom who was bright enough to write it all down in the cookbook for posterity and ease. Any extra frosting will keep in the fridge almost indefinately and taste delicious on brownies, cookies, or graham crackers.

Cake:

3 squares unsweetened chocolate
2 1/4 cups sifted cake flour
2 t. baking soda
1/2 t. salt
1/2 cup butter
2 1/4 cup brown sugar
3 eggs
1 1/2 t. vanilla
1 cup sour cream
1 cup boiling water

Preheat over to 375 degrees. Melt the chocolate over a double boiler, or on low heat in a glass pyrex in the microwave. Set aside to cool. Sift flour, baking soda and salt together. Beat butter until soft. Add brown sugar and eggs, and beat until fluffy. Beat in vanilla and add cooled, melted chocolate. Stir in dry ingredients, alternating with sour cream, until just combined. Stir in boiling water. Pour into greased and floured 9″ pans. Bake at 375 for 25 minutes or until tests done (toothpick inserted in center comes out clean). Cool on baking rack.

Frosting:

4 1-ounce squares unsweetened chocolate
1/2 cup butter
1 pound powdered sugar
1/2 cup milk
2 teaspoons vanilla

Combine chocolate and butter in a saucepan until melted. Combine sugar, milk, and vanilla in a medium sized bowl. Stir until smooth. Add chocolate mixture. Set bowl in a pan of ice water and beat with a wooden spoon until frosting is thick enough to spread.

Sunday, January 18, 2009

The 65 degree oeuf.


Oeuf is French for egg, and when an egg tastes like this, you will think you are eating the finest in complicated French cooking. But really, this egg is perhaps one of the simplest culinary masterpieces you will ever achieve in your own kitchen. It's the 65 degree egg.

What is it about the egg that makes it so special? From a chef's standpoint, it can be hard to define. Eggs are inexpensive, simple, satisfying, full of protein, and fundamental to so many complex dishes. And that is where the science comes in. From the scientist's perspective, the fat and protein structure of the egg makes possible culinary magic in all types of dishes. The proteins in the whites help to raise a batter in baking, the yolk acts as an emulsifier in dressing. Together, the proteins help give texture, firmness, and structure to dishes. And better yet, on their own or dressed up with a few other ingredients, eggs can create an entire meal. Best of all, the egg is spectacular on its own with nothing more than seasoning. Especially when it is a 65 degree egg (or 149 degrees, in Fahrenheit).

This is little miracle arrived courtesy of a small aside in The Splendid Table's How to Eat Supper cookbook. To my delight, the cookbook features an entire section on eggs. Sam and I were flipping through it yesterday afternoon looking for dinner recipes. I came across a sidebar describing the 65 degree egg. The dish was described so beautifully. As Lynn Rosetta Casper and Sally Swift describe, "It is like nothing you have ever tasted. The white is custard-y and the yolk is soft and yielding, basically melting in your mouth...You will be enchanted."

Credit for the creation goes to chemist and self-proclaimed molecular gastronomer Hervé This, who spent time researching hard boiled eggs. During his studies, he hearkened back to an old Jewish dish involving an egg baked for hours in a dying fire. This dish became the precursor to his 65 degree (Celsius) egg.

It sounded so special, and the instructions were so simple, we made it right then and there. We weren't even hungry... yet. We made our egg in the toaster oven. Our old gas oven won't hold a light below 250 degrees, and this recipe calls for only 149 degrees. It turns out the 150 is the minimum our toaster oven demands to remain powered, anything less and my little red light clicks off with the heat. But luckily, 150 degrees is just perfect for these divine little eggs. It's good to remember that Salmonella bites the dust at 140 degrees, so you will be safe with this egg, even if the texture is softer and silkier than any other egg you have tasted.

As you can see from the photo, I don't think our little oeufs came of of the shell as perfectly as the recipe intended, but it was our first try after all. And while it may not look entirely flawless, the taste was almost near perfection. It was as though we had done something complicated and difficult to the egg to achieve the texture. Truly, the whites were a custard, absolutely like what you would expect from a pots de creme or creme brule, but without the sugar. The yolk was pure silk, very smooth and lacking any graininess or stickiness. It was amazing, truly amazing.

The only downside to these eggs is that they are not quick enough for a simple breakfast. To enjoy this delight you must be thinking in advance, as they require a good two hours or more in the oven. But, the wait is worth it. The book suggests serving these next to a salad or with a bundle of asparagus. We ate ours alone, but I can also see it spread on toast with a sprinkle of chives and a bit of course chopped and fried panchetta for lunch, or served with a pasta that calls for a fried egg.

Any way you serve it, you will be amazed. And with such a simple, affordable ingredient, you can even stand to make it right now for snack in a few hours. Go ahead, be impulsive like we were and make the egg right now.

The 65 degree Egg
from the Splendid Table's How to Eat Supper
adapted from Molecular Gastronomy: Exploring the Science of Flavor

Ingredients: Eggs, as many as you would like to eat or serve immediately.

Instructions: Put a thermometer in the oven . Set the oven at just below 150 degrees Fahrenheit. Ideally the oven will be at 149 degrees, but not lower. Give the oven 20 minutes to preheat. Put your eggs on the oven rack. Go do something else fun for a few hours. If the oven goes a few degrees over the temperature, don't worry. They can handle up to 10 degrees over 150, but they loose the custard-like texture with every degree over 150. After a few hours, take out the eggs. Gently crack the shell and ease out the egg, taking care not to puncture it.

Monday, November 17, 2008

Cupcakes for Claire - a chocolate welcome.

I can't help but feel that it is so vastly unjust that those of us that love chocolate cupcakes the most are saddle with a metabolism that prefers spinach salad.

Don't these cupcakes look delicious? They were. I baked them earlier this year when my sister Claire visited, and we commenced eating our way through spring break. I realize with some amusement and a tinge of regret, that this trip is probably part of the reason I am now strictly following a new "healthy lifestyle change" (aka diet) that unfortunately excludes cupcakes. Well, technically the thin and fit nutritionists of the world would have me believe that I can indulge in a chocolate cupcake sometimes, but only if I only indulge once a month, and only if my indulgence consists of only a few bites, preferably with the frosting scraped off. To that I reply, bah humbug. I would rather not have any cupcake than settle for a titillating crumb of a cupcake. It would be a crime to let one of these beauties go partially uneaten in the name of good health and skinny jeans.

So, today, while I nibble on carrot sticks and plan a dinner of black bean soup, I make a plea to those of you that are NOT on a diet, please bake these cupcakes. And if you do, please eat one for me (the WHOLE thing).

Old-Fashioned Chocolate Cupcakes - from Cupcake Bakeshop
14 regular cupcakes / 375 degree oven

1/2 cup (1 stick) butter, room temp
1-1/4 cups sugar
2 large eggs, room temp
3/4 cup flour
1/2 teaspoon baking powder
1/4 teaspoon baking soda
1/4 teaspoon salt
1/2 cup unsweetened cocoa powder
1/2 cup milk
1 teaspoons vanilla

1. Preheat oven to 375 degrees.
2. Beat butter until softened. Add sugar and beat until light and fluffy, about 3 minutes.
3. Add eggs, one at a time, beating until well combined.
4. Measure the flour, baking powder, baking soda, salt, and cocoa powder into a small sized bowl and whisk to combine.
5. Measure out the milk and vanilla and stir to combine
6. Add about a third of the dry ingredients to the butter/sugar and beat to combine. Add about a half of the milk/vanilla and beat to combine. Continue adding, alternating between dry and wet and finishing with the dry.
7. Scoop batter into cupcake cups about 2/3’s full. Turn oven down to 350 degrees and bake cupcakes for about 22-25 minutes or until a cake tester comes out clean.

Note: I try to use the best quality cocoa I can find. It makes a huge difference. Also, this cupcake recipe is the kind that will result in a flat cupcake (not domed). One thing you must be careful of is over-filling the cupcake paper. If the cake continues to rise and has no where to go and will one over flow and two start to sink back on itself as it doesn’t have the structure to hold the excess batter up. So, stick to 2/3’s full and don’t be tempted (as I was) to squeeze that last bit of batter into one of the papers.

Monday, November 3, 2008

Diet = Crustless Pumpkin Pie

Ummm, if you are on a diet, don't even think about eating one of these beautiful French pastries!

It is a cruel and ironic twist when a person who's primary hobby is cooking and eating undertakes the dreaded "D" word... a diet. It's cruel, because a diet robs the food lover of not just vital calories and nutrients, leaving us with a physical hunger, but also robs the food lover of our primary passion, that which gives us emotional sustenance. Dieting, or the unfortunate act of willfully denying ourselves delicious things to eat for the sake of calorie control, robs us of the ability to cook, eat, and feed others with gleeful abandon. Instead, we must count our calories, record what we eat, and forgo goat butter on English muffins in the morning. Drats.

In case you can't tell from my woeful lament, I am on a diet. Only it is not in vogue to call it a diet, so rather I am working toward a lifestyle change. As part of this "lifestyle change" I am doing my best to reconcile the culinary void in my world with a new hobby, exercise. And while I am enjoying vigorous exercise and its healthful benefits, I cannot say it provides the same soulful pleasure as baking chocolate chip cookies with sea salt or visiting the newest restaurant in town for the five-course tasting menu. I will openly admit that I dislike restricted quantities of food (oh the hardship of no cheese or butter or two-percent milk lattes). I will also admit that I do like being healthy (and fitting into Anthropologie clothing), so this is how it must be done.

Yet last weekend I couldn't stay out of the kitchen. The weather was perfect for fall, the leaves were changing, my mood was bright, and the farmer at the farmer's market gave me my very first sugar pumpkin to roast. I had to make pie from scratch. But, how, you might ask, can a girl on a diet justify baking and eating pie? The answer is to forgo the crust. Others might have nixed the sugar, but the truth is that even while trying to cut calories, I refuse to cook with Splenda or other highly processed food substitutes. It goes against my personal standards of wholesome, home cooked, authentic eating. But, I did make a compromise to the best of my ability and last weekend's crustless pumpkin pie was a good step in the right direction.

Try it yourself, it's as good a way as any to enter into your new lifestyle change, and I can now say that canned pumpkin will never hold its own against home roasted again.

Sam's Pumpkin Pie (without crust):
We call this Sam's Pumpkin Pie because he came up with the idea to use sweetened condensed milk rather than evaporated non-fat milk. I think the swap happened one fateful Thanksgiving when all the stores were closed and the pantry only offered milk of the sweetened condensed variety, but we have never gone back to the original recipe since. It's good stuff, and the pie tastes even sweeter when my own sugar pie Sam does the baking!

Ingredients:

  • 1/4 cup granulated sugar
  • 1 teaspoon ground cinnamon
  • 1/2 teaspoon salt
  • 1/2 teaspoon ground ginger
  • 1/4 teaspoon ground cloves
  • 1/4 teaspoon ground nutmeg
  • 2-3 large eggs (depending on quantity of pumpkin)
  • 1 can (15 oz.) pumpkin, or better yet one small sugar pumpkin roasted and pureed
  • 1 can (12-14 fl. oz.) Sweetened Condensed Milk
  • Whipped cream (optional, and certainly not if you are on a diet)
Directions:

MIX sugar, cinnamon, salt, ginger, cloves and nutmeg in small bowl. Beat eggs in large bowl. Stir in pumpkin and sugar-spice mixture. Gradually stir in sweetened condensed milk.

POUR into four individual ramekin dishes. Place ramekins in 9x13 baking dish filled with an inch of water. Bake in water bath.

BAKE in preheated 425° F oven for 10 minutes. Reduce temperature to 350° F; bake for 15 to 25 minutes or until knife inserted near center comes out clean. Cool completely on wire rack. Serve room temperature or refrigerate. Top with whipped cream before serving (but not if you are on a diet, ah-hem "life-style change"!).

NOTE: I think next time I will omit the 1/4 sugar, as the sweetened condensed milk is very sweet and I think it will carry the sugar torch on its own. I am also going to scour the shelves for NON-fat sweetened condensed milk, because I hear such thing exists. I have never seen it, but I am going to hunt it down and stockpile my pantry. My final word of advice is to go heavy on the spices, a pumpkin pie should almost burn in your mouth with fall seasoning. Its what makes it so good.

Wednesday, October 1, 2008

The gift of cake.

Don't you agree that a layered coconut cake just embodies retro charm? I think so. That is why for my birthday yesterday I gave myself the gift of baking. And I baked a coconut cake. Growing up it was always the birthday girl's choice of birthday cake flavors on her special day, and I always chose chocolate. My mom makes mean chocolate cake, and an even meaner chocolate frosting, all from scratch. However my childhood tradition of chocolate birthday cakes came head to head with my desire to bake a coconut cake this year, which is why I originally wanted two cakes, a chocolate and also a coconut cake. I have been waiting and waiting for the chance to try a Martha Stewart coconut cake recipe, and what better opportunity than to bake it as a birthday cake?

But I came to my senses, realizing that alone Sam and I could not consume two entire cakes. As much as I like cake, even I cannot each four pieces of cake a day without exploding. So I made a tough decision and deviated from tradition to try something new, albeit new with an old-school retro charm. It was a good decision. This coconut cake is heavenly.

I will say that part of what made my cake delicious was the frosting. I skipped the light, fluffy, egg-white based frosting of the original recipe and went with the always delicious buttercream. No matter how many cakes I eat, I always prefer the cakes with buttercream over whip, fondant, or meringue frosting. I also skipped the step where I purchase a whole coconut, demolish it with and ice pick, and peel individual curls to roast in the oven. That just seemed too violent and time consuming for birthday baking.

And of course I displayed the cake on my vintage milk glass cake plate, my favorite piece of serving ware in my kitchen. The combo of a good cake, a better frosting, and the best cake plate made me a very happy birthday girl.

Coconut Cake
from Martha Stewart's Baking Handbook.

This cake was fabulous, absolutely fabulous. It had an almost pound cake-esque buttery richness, and it was dense, but still very cakey. I deviated from the recipe and toasted the coconut before I pulsed it into a powder to blend with the flour. This may or may not have resulted in a drier cake. Regardless, the cake remained very moist and rich, a real birthday keeper.

3 sticks (1 1/2 cups) unsalted butter, room temperature, plus more for pans
3 1/2 cups all-purpose flour, plus more for pans
1 tablespoon plus 1 teaspoon baking powder
1 teaspoon salt
1 cup packed sweetened, shredded coconut
2 2/3 cups sugar
4 large whole eggs, plus 4 large egg whites
1 tablespoon pure vanilla extract
1 1/2 cups unsweetened coconut milk
Buttercream frosting
Coconut curls, for garnish

Preheat oven to 350 degrees F. Butter two 9x9 inch cake pans; line the bottoms with parchment paper. Butter parchment, and dust with flour, tapping out the excess, set aside. Into a large bowl, sift together the flour, baking powder, and salt. Pulse shredded coconut in a food processor until finely chopped. Stir chopped coconut int the flour mixture until combined; set aside.

In the bowl of an electric mixer fitter with the paddle attachment, beat the butter and sugar until light and fluffy, about 4 minutes, scraping down the sides of the bowl as needed. Add the whole eggs, egg whites, and vanilla; beat until fully incorporated. With the mixer on low speed, add the flour mixture in two parts, alternating with the coconut milk and beginning and ending with the flour; beat until combined after each addition.

Divide batter between prepared pans, and smooth with an offset spatula. Bake, rotating pans halfway through, until cakes are golden brown and a cake tester inserted in the centers comes out clean, about 55 minutes. Transfer pans to a wire rack to cool 30 minutes. Invert cakes onto the rack; peel off the parchment. Reinvert cakes and let them cool completely, top sides up.

Using a serrated knife, trim the tops of the cake layers to make level. Place one layer on a cake plate, and spread top with frosting. Place other cake layer on top. Spread remaining frosting over entire cake, swirling to cover in a decorative fashion. Spring entire cake with toasted, sweetened coconut. Cake can be kept in the refrigerator, cover with a cake dome, for up to 3 days.

Buttercream Frosting
This is a memorized, taste-as-you-go recipe that works on almost anything. I say just mix the butter, sugar, and flour until you like the flavor, and add the milk until you reach the consistency you prefer. We added a pinch of salt to cut the sweetness, and it was good. If I was very clever, I would have saved some of the leftover coconut milk from the cake recipe and subbed it for the milk in the frosting.

2-2 1/2 sticks butter, room temperature
5 - 6 cups powdered sugar
2-3 tsp. vanilla extract
2-4 tablespoons milk or cream, or coconut milk

Cream butter and half of the sugar. Add remaining sugar, vanilla, and half the milk. Add additional milk as needed until you reach desired consistency.