Sunday, September 7, 2008

1930's Butterfly Blouse: Pattern Review

I truly love this pattern. I have already completed it twice, and I have fabric purchased for a third. In fact, I find myself actively restraining my urge to make it again and again and again. I think I might be happy to make at least 7 of these shirts, one for every day of the week. Why do I love it so much, you may ask? Let me count the ways: 1) It is a simple shirt to make, perfect for a beginner and a quick sew for an advanced seamstress, 2) The style is utterly vintage yet integrates very painlessly into a modern wardrobe, 3) The shirt is flattering, I imagine, for all shapes, sizes, and body types, 4) The pattern comes from Decades of Style, run by a small-business owner who is invested in resurrecting inspiring vintage patterns and making them available for ALL sewers. These are a lot of good reasons to love the pattern, and even better reasons to make multiples of this top. Below is my full pattern review.

1930's Butterfly Blouse: Pattern Review

Pattern Description:

Straight from the pattern envelope: "It is a wrap blouse with a saddle yoke at the shoulder and flowing, elbow-length sleeves. There is shirring at the shoulders in the front and ties that wrap around the back and meet at the front waist." My own ad-lib is to describe the sleeves, which are gorgeous and give the shirt its "butterfly" description. The sleeves are long (elbow-length), full, and flowy and utterly feminine and pretty.

Pattern Sizing:
The highlight of this pattern is that it comes in such a variety of sizes, from a 30" inch bust through a 46" bust. I sewed the largest size, designed for a 46" bust, 40" waist, and 49" hips. It's wrap styling allows for a flexible fit. If you like it tight, cinch the waist ties. If you like it low-cut, make a smaller size and the wrap will not overlap as much across the bust. The power is yours to create your perfect fit.

Did it look like the photo/drawing on the pattern envelope once you were done sewing it?
Absolutely. Everything about it is dead-on, include the beautiful saddle yoke and the gathering above the bust. You must choose the right material to get the same drape as the envelope, but it is totally possible. You will want a medium to lightweight fabric with a nice drape. Silk, voile, rayon, gauze and chiffon are all great.

Were the instructions easy to follow?
The instructions were very clear and easy to follow, including a diagram of each major step. The instructions also come in a 8.5x11 booklet form, rather than as a large multi-folded sheet like most commercial patterns, which I found easy to deal with in the midst of sewing chaos.

What did you particularly like or dislike about the pattern?
Likes: I ADORE the style. The sleeves on the finished garment are so dramatic, elegant, and eye catching. I think the top is very sexy, not because it is revealing, but because it is so feminine. The voluminous sleeves hint at the shapely curves of a lady without showing a lot of skin. Plus, the deep V neckline and the waist-defining sash give shape and structure to balance the volume.

This is a unique pattern. You will not find other women wearing this style, especially not in ready to wear. And I love that the pattern is available in a variety of sizes!!! All ladies deserve to wear vintage, and this pattern is so egalitarian in its sizing.

I found the directions very clear, and overall the top was quick and simple to sew. It only involves a few pieces - 5 all together including the sashes - connect by just a couple of simple seems, so it is quick and good for an advanced beginner.

Dislikes: I am very pleased and do not have dislike.

Fabric Used:
For both versions I used a very lightweight, 100% cotton, semi-sheer fabric. The first time through was a bold floral, the second time this soft, demure yellow. Both versions are finished with 1/4 cotton bias tape to finished all edges (instead of hems). Read below for my description of the bias tape modification.

Pattern Alterations or any design changes you made:
The original pattern calls for top stitching along all the bodice pieces, but after a few practice tries at top stitching, I realized I am pretty bad at straight, even, controlled top stitching and I resorted to trimming every edge with bias tape, then top stitching the bias taped finish to the edge of the other pieces. Thus, I did not have to fold a perfect 1/8 hem on the noticeable front yoke of the shirt. I am VERY pleased by the bias tape results, because I think the trim adds an extra bit of detail and sophistication.

I used tiny quarter inch biased tape, which is really, really small. It took me several feet of pinning, sewing, messing up, cursing, and starting over to devise a plan that worked better than pins. So, fellow sewers or anyone who might ever work with bias tape, here is my tip of the day: IN ORDER TO PRESERVE YOUR SANITY AND YOUR FINGERS, USE A WATER BASED GLUE STICK TO BASTE TINY BIAS TAPE ON DELICATE FABRIC. Don't use pins. Pins don't work. But glue, use it!

My yellow version of the shirt was created using significantly less fabric than the pattern calls for, so I shortened the length of each sleeve by 6 inches all around. To achieve a shortened sleeve, I traced the sleeve pattern onto a new piece of pattern paper. Using my hem gauge, I marked a dot six inches in from the pattern edge every inch or so, making sure to match the angle of the edge with my mark. I then traced the dots together, snipped the pattern shorter, and proceeded with the construction of the shirt per the standard instructions. I am pleased with the shortened sleeves, as they saved fabric and have a more "day-wear" or "work-wear" wearabilty to them, however the original long sleeves are still my favorite, and they are the way I plan to use this pattern the next time I sew it.

For the yellow version, due to lack of fabric, instead of cutting a single back piece on the fold as indicated, I converted the center back fold into a seam, added seam allowance, and cut two pieces. You can see the seem in the back photos. This worked very well, and since I used a french seam binding for my seam finish, it looks very nice in the back of the shirt. On the floral version of the shirt I cut the back as one single piece, fussy cutting to center a big floral right in the center of the back.

On my yellow shirt I also made the wrap ties extra long so they tie in back, rather than in front. Both front of back ties look great, it is nice to have variety.

Would you sew it again? Would you recommend it to others?
Yes, and I did. I have made two versions of the shirt, and I already have fabric chosen for teal blue knit to make a third. Plus, I am utterly convinced that somehow I can convert this into a wrap-dress... although I am not sure about how to do that yet. The sleeves the the saddle yoke are just so great, I would like to incorporate it into all of my wardrobe!

Conclusion:
This is a fun and simple shirt from a great pattern company. I am very loyal to Decades of Style because of the extended sizing and variety of design. I recommend this pattern to all sewers, vintage enthusiasts, plus sized sewers, beginners looking for a unique project, and basically anyone who wants a dramatic and very wearable shirt.

p.s. All photographs taken by my very talented husband Sam at the Olmos Perk Coffee Shop on McCullough in San Antonio, and in the adjoining abandoned boxcar yard. It's my new favorite coffee shop in town, their espresso is rich, bold, and authentic and the vibe in the shop is relaxed, local, and hip.

The sexy and yet subtle 1930's Butterfly Blouse, I love it so much I just want to kiss it!

Saddle yoke, gathered front, bias trimmed edges, and wrap shirt front.

The saddle yoke, flutter sleeves, and shirt back.

Tuesday, September 2, 2008

And then, we toobed!

Anchoring to the all-important coolers of beer.

To be honest, Sam and I selected our wedding date based on one all important factor... our ability to go tubing the day after the wedding. Was it non-traditional decision-making? Yes. Can it be considered viable and legitimate grounds for hosting a South Texas outdoor wedding on one of the hottest weekends of the year? Debatable, but ultimately, YES!

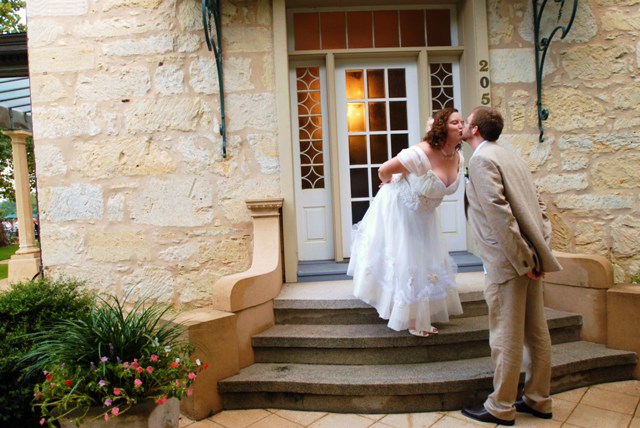
So on Saturday September 1, 2007 Sam and I celebrated our wedding between fits of downpours and lulls of crushing humidity. The wedding night cleared up in the nick of time for our outdoor ceremony and reception in the garden. That night we danced with glee, hair matted with perspiration to our brows and upper lip sweat prickling the corners of our smiles. But the heat was worth it, because the next day the entire wedding group entouraged to the Comal River near Gruene, Texas and floated the river, beers in hand, recuperating from a night of dancing, eating, revelry, and sweating!

A quick guide to South Texas culture for all your non-Texans and those unfamiliar with tubing. First, the leisure activity is commonly referred to as TOOBIN' rather than the more formal tubing. Yes, I know it is incorrect spelling, but just roll with it. Guadalupe is really pronounced Gwaaaa-dah-LOOP, so ignore your urge to use the correct Spanish pronunciation. By the way, the Guadalupe is a lovely river just north of San Antonio, ripe for lazy afternoon toobin' trips. The Lone Star is both the great symbol of Texas independence AND a mildly-delicious, cheap beer for the river. Y’all is acceptable to interject at both the beginning and ends of most any sentences, for example “Y’all, we are going tubing after the wedding!” and “Don’t splash me with the river water, y’all!” Finally, nothing tastes as good as Rudy’s BBQ after a hard day of toobin’!

Sweating in my wedding dress was a small sacrifice in exchange for the delight of sipping beer and lounging in an inflatable tire tube with friends and family the day after my big day. Cheers for Texas!
Anne and Lucy and Mr. Bud Light.

Cousin Michaella, a fish at heart.

Jon Stern, with Sam in the background.

Blake and Anne.

Sam and Kate, post wedding, pre honeymoon, and relaxing on the Comal.

Monday, September 1, 2008

The happiest day.

What a wonderful feeling to wake up on a Monday morning and realize it is a long weekend. What an even better feeling to roll over, yawn, and smile at the person sleeping next to you before waking them with a kiss and a "happy anniversary." Today is Sam and my's first wedding anniversary, and on a long weekend to boot!

I loved our wedding. Of course I love our wedding day because the day is symbolic of my union with the man I love and will love for all of my livelong days. But I also love it because I am so proud of our wedding as an event. I feel our wedding wrapped into a night of dinner and dancing the pure essence of our personalities. It was playful, a bit classic but also uniquely original, with a great emphasis on sharing with friends and family and a minimal emphasis on pomp and circumstance.

Our Clauddah rings.

The ceremony went by in a blur, but the lasting memory of the marraige ceremony is still very important to me and I wear it every day on my left hand. The story of our rings is very symbolic of the mood of our wedding. It was more about being with each other and the people we love than the traditional bravado of a wedding. Our rings are traditional Irish Clauddah rings. The design is a heart, held between two hands and topped by a crown. This is a traditional Irish design symbolizing the qualities of the best relationships. The heart, in the center, symbolizes love. The hands surrounding the heart are a symbol of friendship, and the crown atop the heart is a sign of eternal loyalty.

Sam and I bought these rings together in Gallway, Ireland in 2003 and we have been wearing them for the majority of our relationship. I spent most of my semester abroad (and our first few months in love!) away from Sam, and the ring on my right hand was a constant reminder for me of our stable and meaningful relationship. We have worn them together, apart, in the best moments and the moments that can be hard, and we still wear them now as a symbol of our union. For me, my Clauddah ring is the only piece of jewelry I feel comfortable wearing on my left ring finger, so instead of swapping the jewelry for another ring when we wed, we kept them and turned them into our wedding bands.

As a couple, we believe in the importance of friends and family. At our ceremony we passed our rings through the crowd and asked each of or guests to briefly hold our wedding bands and give them their blessing. It was our sincere hope that as each guest held the rings, they took a moment to reflect on this symbol of marriage and commitment. Sam and I know that our individual relationships with all those that we love were an important part of who we were when we met and fell and love, who were were when we stood to get married, and who we will be as we move forward as a couple. Now, when I look at my ring, I see it as a symbol of love and support from both my husband, and from all of the people in our lives that contributed to our journey to this point and who will continue to support us through our marraige. Our rings have an extra level of symbolism from the wedding day.

While the ceremony is a blur in my memory, the reception is a gleaming, vivid, whirlwind memory of laughing, eating, toasting, dancing, hugging, smiling, and celebrating. The reception was nothing short of a riot. We feasted on a dinner featuring herbs and summer garden ingredients, including peach tarragon gazpacho, basil caprese salad, herb marinated lamb loin, creamy polenta, sage cloverleaf rolls, and of course rum wedding cake. I tucked rosemary sprigs into each napkin because rosemary represents fidelity. And we put out jars of cookies and old fashioned bottles of milk after dinner because, well, because people like cookies, and we wanted everyone to be happy.

We danced all night long on the rooftop of the historic Guenther House to Lil' Bit and the Customatics, only THE BEST local rockabilly band in town. They played a special rendition of Patsy Cline's "Walkin After Midnight" for our first dance, and Sam and I put to work the months of swing dancing lessons we endured...er, enjoyed, before the big day. Just kidding, we loved learning to dance and putting it into practice that night. I heard it rumored that our band was initially concerned that our wedding was going to be a flop of a night when they first started playing, because they were set up and performing on the rooftop while we dined demurely in the garden below. But... by the end of the night vocalist Lil' Bit and bassist Tom Cat said we were the MOST FUN wedding they have ever had the pleasure of playing because our guests were so enthusiastic with the dancing, the drinking, and the rooftop revelry. They might not have known how to swing, but that did not stop anyone from bustin' their moves on the old tile floor. There was even a pinata in the shape of a wedding cake. We closed the place down with our merrymaking, leaving me with sore dancing feet, a huge smile, and one excellent husband to have and to hold for ever more.

And that, in more words than most will read but thousands less than I could write about the day, is the reason that Sam and I share the most wonderful wedding memories one year later this September 1. Happy Anniversary my love.

Maid of Honor and my dear sister Anne, and my mother Sarah.

My wedding dress bodice, adorned with hand embroidered silk florets. The dress is most beautiful garment I have ever worn.

Best Man Roger, Groom Sam, and Groomsman Jarret waiting out the rain inside before the outdoor ceremony.

We feasted under the arbor of the Guenther House, aglow under hanging lanterns.

Champagne for toasts!

Guests feasting at the banquet tables under glowing lanterns in front of wheat grass and garden flower living centerpieces.

Reading: On Marriage by Kahlil Gibran
Read at our ceremony by my sister and Maid of Honor Annie Eden

Then Almitra spoke again and said, "What of Marriage, master?"
And he answered saying:
You were born together, and together you shall be forevermore.
You shall be together when white wings of death scatter your days.
Aye, you shall be together even in the silent memory of God.
But let there be spaces in your togetherness,
And let the winds of the heavens dance between you.
Love one another but make not a bond of love:
Let it rather be a moving sea between the shores of your souls.
Fill each other's cup but drink not from one cup.
Give one another of your bread but eat not from the same loaf.
Sing and dance together and be joyous,
but let each one of you be alone,
Even as the strings of a lute are alone
though they quiver with the same music.
Give your hearts, but not into each other's keeping.
For only the hand of Life can contain your hearts.
And stand together, yet not too near together:
For the pillars of the temple stand apart,
And the oak tree and the cypress grow not in each other's shadow.

Thursday, August 28, 2008

Guest Blog #4: Handpicked Blackberry Pies

The following is the fourth in an ongoing series of guest blog appearances by friends and family, and someday maybe even fellow blogging strangers that I don't know personally, but who read my posts (could this be you... if you are interested in guest blogging, send me an email!). My dear friend Sarah, who in addition to being very smart and funny also makes a mean black bean taco and is a fiend for margaritas, enjoyed the fruits of her labor (haha, silly pun intended) after a recent trip to the blackberry fields. Enjoy the pie!

Handpicked Blackberry Pies
by Sarah Torrance


After moving to Washington, DC three years ago, I made a fantastic discovery. Farms across Maryland open their doors to Washingtonians desperate for grass, trees and fresh air to come and pick their produce. Personally, I think this is the most genius idea that any farmer ever came up with: people actually paying the farmer to pick his/her crop and being SUPER excited about it.

My friend Cynthia introduced me to Butler’s Orchard and has been my berry picking buddy ever since. We prefer to go for blackberries only, even though Butler’s Orchard allows you to pick strawberries, blueberries and raspberries. Blackberries are basically the easiest berry to pick since you are not required to reach too high or bend too low to fill your bucket.

I set a personal record this year picking 5.2 lbs of berries in just under 40 minutes not including all the berries I ate while I was picking. Once the picking is done and the berries are washed, Cynthia and I are always met with the dilemma of what to do with the massive amount of berries we have picked. Cynthia is considerably more ambitious then I and makes jars upon jars of blackberry preserve every year. I prefer to make blackberry pies, because I truly believe they are the easiest thing in the world to make and everyone and their mother thinks that you are an amazing pastry chef after making just one pie, once a year.

After you have finished picking your berries or purchasing them for an astronomic mark-up, you just need two additional ingredients for the filling: white sugar and all-purpose flour.

Exact ingredients:

4 cups fresh blackberries

1/2 cup white sugar

1/2 cup all-purpose flour

Combine 3 1/2 cups berries with the sugar and flour. Smash everything together until you have a chunky, syrupy mix. Spoon the mixture into an unbaked pie shell. Spread the remaining 1/2 cup berries on top of the sweetened berries, and cover with the top crust. Seal and crimp the edges. Brush the top crust with milk, and sprinkle with sugar.

I had a little fun with attempting to cut out heart shapes in the top crust of one pie (which is harder than it sounds). I have to say that was my favorite part of the whole activity.

Bake at 425 degree F for 15 minutes. Reduce the temperature of the oven to 375 degrees F, and bake for an additional 20 to 25 minutes.

I bought store bought pie crusts for the bottom half but made my own pie crust for the top.

1 1/3 cup all-purpose flour

1/2 cup Crisco vegetable shortening

1/2 teaspoon kosher or coarse salt

3 tablespoons ice water

Mix flour and salt in mixing bowl. Add shortening into the flour, until mixture resembles the texture of tiny peas.

Once the mixture is the right texture, add the ice water and mix with a fork. Quickly gather the dough into a ball and flatten into a 4-inch-wide disk. Wrap in plastic, and refrigerate 30 minutes.

Remove dough disk from refrigerator. If stiff and very cold, let stand until dough is cool but malleable.

Using a floured rolling pin, roll dough disk on a lightly floured surface from the center out in each direction, forming a 12-inch circle.

Whether you make the crust yourself or buy the Betty Crocker version that just requires you to add water, everyone will think that you are the best chef ever…at the very least you will be very impressed with yourself.

Monday, August 25, 2008

The Teton Crest Trail

Hiking along Death Canyon Shelf on the Teton Crest Trail.

I just spent the past seven days in vacation oasis, away from my usual life and surrounded by the wilderness and my favorite people. There was no cooking, no sewing, no dress designs, and no thoughts of fabric or recipes. There were however mountain views, wildflowers, fresh air, and good old fashioned huffing and puffing up steep mountain divides. I was on the Teton Crest Trail in Grand Teton National Park with my husband, my parents, my two youngest sisters, and two very good family friends.

On our 5-day, 39-mile backpacking adventure, we tackled such delightful obstacles as the Death Canyon Shelf, Hurricane Pass, and Paintbrush Divide. Oddly enough, the hardest portion of the trail - Paintbrush Divide - sounds the most serene, while the easiest part of the hike - Death Canyon Shelf - sounds like hell on earth. Both were memorable. We camped at Marion Lake, Alaska Basin, Cascade Canyon, and Lower Paintbrush Canyon.

Each part of the trip was uniquely inspiring. A hard first day left me collapsed on a rock desperately sipping Gatorade and staring at the still water and cliff's reflection at Marion Lake. The next day I recuperated with an easier, flatter hike along the Death Canyon shelf, surrounded by fields of flowers and overlooking dramatic mountain views. Death Canyon Shelf is a broad bench below the crest of the Meeks Mountain range overlooking Death Canyon. To the west was a 3-mile-long escarpment of daunting cliffs and to the east the shelf abruptly plunged into the deep trough of Death Canyon over one thousand feet below. We ate lunch next to a mountain stream that flowed into a small crack in the shelf and disappeared abruptly, plummeting into this trough of a canyon below. You don't see a stream disappear every day! The wildflowers along the Death Canyon Shelf were unlike anything I have ever seen, and I live in South Texas, the self proclaimed wildflower capital of the states. BEAUTIFUL!

Day three met us with our first big hill, but Hurricane Pass rewarded us with one of the most incredible views I have ever had the pleasure of viewing! After a steep and tiring climb (I had to use my rest step AND sidestep techniques to keep from collapsing with fatigue), we rounded the curve of the pass and saw due east the Grand Teton (13,770'), Middle Teton (12,804') and South Teton (12,514') peaks towering over us about a half mile away. The photo below cannot capture the spectacular perspective of the mountains looming above us, but it comes close.

We camped just below Lake Solitude in Cascade Canyon, with a gorgeous sunset view of the Grand Teton and about 10,000 mosquitoes. As the sun set and the view enhanced, the biting bugs eventually gave way to small, pesky, non-biting flies. Thank heavens the flies did not bite, because many of us were already covered in a multitude of itching bites. Claire had 14 bug bites on her right shoulder alone!

On our second to last day we completed the hardest, most magnificent day of hiking. From Lake Solitude we climb from 9,035 feet to head over Paintbrush Divide at 10,720' feet. The trail moved us out of the North Cascade Canyon's U-shaped glacial valley and seemed to stretch above me for what looked like miles as it ascended Paintbrush Divide's never ending switchbacks. We gained 1500-foot of elevation in 2.5 miles. It is a glorious stretch of trail with the Grand Teton right in front of every southerly heading switchback, but the day was ominously cloudy, windy, and gray, giving me the humbling feeling of mother nature's power. A ranger we passed even shared a prediction for snow. We were actually quite relieved to finished the divide, as the windy gusts at the top were strong enough to almost sail us off the mountain. Some Brits we met on the trail even confessed to crawling across the divide to prevent being blown away.

We finished our adventure with a quick (yes, very quick, it was freezing cold) dip into String Lake. The water was frigid, our feet and legs went instantaneously numb, and the view was (still) majestic. Off to the showers for a two-shampoo washing, and the trip was complete. Such a delight!

The group and the Grand at the top of Hurricane Pass. Yes, the wind was blowing as though we were in a hurricane, but the view was worth a pause. After a steep climb up and up from Sunset Lake we were rewarded with a stunning, towering view of the Grand and its partners looming near the trail.

Hikers round a switchback in front of a turquoise-blue glacial lake. You can barely see the tongue of the the glacier lapping at the base of the pool. The glacial flour suspended in the water, made of powdered rock ground down by the ice, gives the pool that brilliant color when the green and blue wavelengths of light are reflected back out of the water while the other wavelengths of light are absorbed in the flour.

Fields and fields of wildflowers stretched out along the 39 miles of trail. I have never, and I mean NEVER, seen or even imagined such an abundance of wildly beautiful blooms. It was stunning, especially in contrast to the rocky peaks in the distance. It would be impossible to recreate or fabricate this kind of floral display in the modern world. Even the best botanical gardens cannot compare.

The moon setting over Marion Lake at our first campsite.

Claire, Lisa, me and Sam rewarded ourselves for a hike completed with a freezing dip in String Lake at the culmination of the trip. This is a plunge only for the brave, as the water is snowmelt and cold enough to suck the breath right out of you! Sam earned a prize for braving the friggid water with the ladies. :)

Tuesday, August 19, 2008

A figgy synergy.

I am on vacation this week, but I could not resist posting this recipe to compliment the fig ice cream in the last post. They are a perfect match, salty, sweet, crunchy, creamy, and very authentic. Enjoy the short fig season with this as a compliment, and carry this recipe into the fall and holiday season.

Butter Shortbread Cookies

Editor's note: This recipe is from Ming Tsai's Simply Ming.

The recipe makes four logs of dough, which can be used to make one log each of classic shortbread, five-spice shortbread, double chocolate-ginger shortbread, and caramel macadamia nut crunch.
Servings: Makes 4 logs 10 inches long by 1 1/4 inches in diameter.
1 1/2 cups (3 sticks) unsalted butter, at room temperature
1 1/3 cups sugar
2 teaspoons kosher salt
3 egg yolks
2 tablespoons vanilla extract
Interior scrapings of 1/2 split vanilla bean, preferably Tahitian
3 3/4 cups all-purpose flour

1. In the bowl of a mixer, combine butter, sugar and salt and cream on medium speed until blended, about 2 minutes. One by one, add the egg yolks, mixing until incorporated. Add the vanilla extract and the scrapings of the vanilla bean. Scrape down the bowl.

2. Turn the mixer off and add the flour. Turn the machine to low and mix until the flour is completely incorporated. Remove the dough from the bowl. Working on parchment or wax paper, form dough into 4 logs 10 inches long and 1 1/4 inches in diameter; wrap and chill.

3. Use each log to make a different cookie: classic shortbread, five-spice shortbread, double chocolate-ginger shortbread, and caramel macadamia nut crunch.

Cook's note: You can freeze the dough flavored or unflavored, in logs or not — for up to 2 weeks.

Classic Shortbread

1 cup granulated, raw, or turbinado sugar
1 chilled log of butter shortbread cookie dough

1. Preheat the oven to 325°F. Place the sugar in a small bowl.

2. Cut the log into twenty 1/2-inch rounds. Dip one cut surface of each of the rounds into the sugar and arrange them 2 inches apart on all sides on a parchment-lined or nonstick cookie sheet or sheets.

3. Bake until golden brown, 15 to 20 minutes. Cool the cookies on a wire rack.

Friday, August 15, 2008

A beautiful Saturday morning at the San Antonio Farmer's Market

I am feeling guilty about dogging on San Antonio farmer's markets so often in my posts. The truth is that San Antonio does not have a lively farmer's market scene. It cannot stand up to the markets I have been in other cities, like Boulder, where the farmers' goods stretches on for a solid city block and includes dozens of farmers, artisan bakeries, cheese suppliers from local creameries, and honey and jam vendors. I even saw a booth at the Boulder farmer's market a few few years ago that focused entirely on all varieties of fresh garlic. I bought eight different kinds of cloves! It comparison, the San Antonio scene is very minimal.

Yet, at teh same time, minimal is far superior to absent. And what minimal market we have was thriving with honest, kind, and proud farmers showing their produce from very small local farms. So in truth it was the essence of what a good farmer's market should be. I found it delightful. Sam and I went to the market early Saturday morning and wandered. The pretest booth was a vendor selling ripe Hill Country peaches and flowers out of metal buckets. We did not buy any flowers, alas, but we did purchase tomatoes, pickling cucumbers, a watermelon, and TWO POUNDS of fresh figs.

Oh they were good. And so cheap! I paid $9 at the grocery store two weeks ago for six - yes, count them, six - ripe figs. Yet at the farmer's market they were sold about 15 figs for $5. A royal bargain. I have an Italian fig ice cream that I have been holding onto for this exact moment, so I made it for a dinner party this week. It was ripe fig perfection.

I served the ice cream with a very salty shortbread cookies and it was a perfect compliment. Several guests crumbled the cookie on top of their frozen dessert, and I followed suit to much delight. The salt and the creaminess of the ice cream really spotlighted the fig flavor. And I love the texture of tiny little fig seeds, and they gave the tiniest hint of texture to the ice cream. They are so fun to chew, fresh or frozen. Fig seeds are so gentle, the just pop in the mouth. It is like the champagne of fruit!

Gelato di Fichi - Fig Ice Cream
from Marcella's Italian Kitchen by Marcella Hazan

I modified the recipe by reducing the sugar and increasing the dairy fat. My changes are noted in the recipe below. The original recipe calls for 2/3 cup sugar, and 2/3 cup water and 2/3 cup milk. As you can see, I cut back the sugar, and I subbed half and half in place of the water. What can I say, I like a creamy ice cream. My ice cream confidence is also still smarting a bit from a Cooking Light recipe I tried recently that used 2 percent milk in place of cream, and it just ended up crystallized. I like ice CREAM, hence the half and half. My final product tasted delightful, very rich but not too sweet. Definitely cut back the sugar if you figs are ripe and sweet, you want to taste the fruit over the taste of sweet.

1 pound fresh figs
1/2 cups granulated sugar
2/3 cup milk
2/3 cup half and half

1. Wash the figs, remove the protruding stem, but do not peel.
2. Blend figs and sugar in a food processor. Puree to a creamy consistency.
3. Add the milk and half and half and process a few moments more, until the sugar is dissolved.
4. Transfer to an ice cream maker and freeze according the the manufacturer's instructions.


Tuesday, August 12, 2008

Rose Lemonade at a summer concert.

I love to listen to Lynne Rossetto Kasper host The Splendid Table on the weekends, because she speaks so emphatically about cooking and eating, and she also seems to know everything! For example, a few weeks ago a listener called into the show and asked about how she could use rosewater in her everyday cooking. Lynne rambled off a list of ideas, and the idea that stood out to me was her rose lemonade with fresh flowers. She suggested adding a dollop of rose water to a pitcher of ice cold lemonade, topped with fresh edible buds. Viola, a stunning centerpiece and refreshing beverage all in one.

I had to give it a try, and this weekend's Jazz at the Witte was a good occasion. Combine the lemonade with a Caprese sandwich made with fresh basil and a basalmic reduction, then plop everything on a picnic blanket with your honey next to you, some jazzy music in the background, and the shade of a huge oak tree shielding you from the hot summer sun, and you have yourself a delightful summer afternoon.

Rosewater Lemonade
as adapted from Lynne Rossetto Kasper on The Splendid Table

Rosewater essence is very affordable and can be purchased at Middle Eastern food markets and online. A small bottle goes a long way. I think I may use too heavy a hand in when pouring my rosewater, as I tend to ascribe to the philosophy that if a little is good, a lot is better. However, when it comes to rosewater, abundance is not the best course of action. You really can overdo it with just a few extra drops. The goal is to add a light essence of rose, more of a second thought or an auroma than an actual flavor. Too much starts to taste like perfume. Please proceed lightly, drop by drop by drop, until you find your desired essence.

Ingredients
1 1/3 cups fresh lemon juice
1 cup sugar
5 1/3 cups water
Rosewater essence

Mix the lemon juice and sugar in a large container or pitcher until the sugar has dissolved. Add the water and stir thoroughly. Taste and add more sugar if desired. For a truly Middle Eastern taste use a portion of honey in addition to sugar to sweeten the tart. Add the rosewater essence to your desired strength. I start with half a tablespoon and add more if needed. Be careful, as too much essence will cause the rose flavor to overwhelm the other flavors in the lemonade. Chill well before serving. Serve over ice.

You can also mix up a pitcher of frozen concentrated lemonade instead of using fresh lemons. Start with a half tablespoon of essence and add more as desired. Additionally, you can combine about half a teaspoon of rosewater essence with a tall glass of lemonade for a single serving.

For an incredible presentation, sprink eddible flowers (preferably rosepetals) on the surface of the lemonade. Serve with straws in old mason jars for a summer picnic!

Monday, August 11, 2008

Big'Z burgers, and more importantly, FRIES.


Yes, that's a fried egg on a burger. At Big'Z Burgers, they call themselves "Big, Pink, and Dirty." While I know it sounds like a lewd sexual reference, what they are really communicating is that their half-pound burgers are huge, cooked to a perfect pink-in-the-middle medium, and served "dirty" with a fried egg on top if desired (and I always desire it dirty!).

The burger joint is my personal favorite. An entirely local place, it is owned and operated my San Antonio's own renowned chef Andrew Weisman. Chef Weissman's jewel is the nationally acclaimed La Reve restaurant in downtown San Antonio, serving multi-course tasting menus featuring classical French cuisine (Update: Chef Wissman's jewel WAS Le Reve, because Le Reve closed October 2009). I have not eaten there, but my office mate has, and he swears it might be the best meal he has ever experiences (Update: I DID eat there before it closed, it was amazing!). They serve a cheese course before dessert, complete with a lump of honey on the comb, and there is a waiter for each table who's exclusive job it is to place the correct silverware on the table before each course. It sounds fabulous!

The impression thing is that Weisman's passion for food is evident in the quality of food at each of his many restaurants, including the burgers and fries at Big'Z. Sure, it may be a comfortable, down-home burger joint, but the food is anything but average. The burgers are cooked made to order, and when you order medium, you get a truly pink and juicy medium. That's a big deal for me. In a world of prolific chain restaurants that ask you how you like your meat prepared and always serve a well-done patty regardless, a medium burger is a treat.

However, in my humble opinion, the best part are the fries. They are cooked to order and served in a paper cone, European style. And in true European fashion, Big'Z fries come served with mayonnaise as a dipping sauce. And not just any mayonnaise, but a variety of flavored mayonnaises like Kalamata Olive mayo, Wasabi mayo, Roasted Garlic Mayo, Sun Dried Tomato Mayo, Cilantro Lime mayo, Horseradish Mayo, Basil Pesto mayo, Cucumber Dill mayo, and my personal favorite, Rosemary Garlic Mayo. The mayonnaise is supplemented by some fabulous dipping ketchups as well, including Pineapple Curry ketchup, Habanero ketchup, and Chili Garlic ketchup.

Because I cannot eat burgers every day, even though I might like to, I recreated a frite dipping sauce at home that is good enough to serve at Big'Z, maybe even better than the sauces there. It is a breeze to create, and is the kind of condiment that will jazz up most any summer dish. I made the whole thing in my mini food processor in about 10 minutes, cleanup included. I also included a recipe for oven-baked fries and three dipping sauces that look like they just escaped from the menu at Big'Z. Try them all. I promise, it's so worth the effort to elevate beyond the standard ketchup. So, until my next venture into burgerland, I am set, and you will be too.

Shortcut Basil Aioli
as posted by Orangette, in all of her infinite culinary mastery. I should note that I am a huge fan of her recipes, in fact, I might almost consider myself a groupie, albeit a lurking groupie. I read her blog and love her recipes and even talk about her frequently at the dinner table, yet I have never left a note on her blog or had any direct contact with the lovely blogger. So really, I am sort of an Orangette stalker. Nonetheless, this recipe, from her site, is delicious, and fits the ticket for what would be served with the fries at Big'Z.

2 Tbsp. olive oil
¼ cup packed basil leaves
½ tsp. lemon juice
1 medium garlic clove, pressed
Pinch of salt
½ cup mayonnaise, either homemade or commercial

In the jar of a blender (or a small food processor), combine the olive oil, basil, lemon juice, garlic, and salt. Process until the mixture is smooth like pesto, pausing every now and then to scrape down the side of the blender jar with a small spatula or knife.

Put the mayonnaise in a small bowl. Add the basil mixture, and stir well to mix.

Serve as a dip for raw vegetables, spread onto sandwiches, folded into chicken salad, or dolloped on top of deviled eggs (minus the paprika and hot sauce, preferably).

Note: This recipe doubles very easily. However, don’t automatically double the amount of garlic and salt called for here; start with the quantities for a single batch, and then add more to taste.

Yield: a little more than ½ cup

French Fries with Three Dips:
The recipe below is from Perfect Parties by Linnea Johansson.

Ingredients:

4 large potatoes
1 tsp vegetable oil
Salt

Rosemary Mayonnaise
1/2 cup mayonnaise
2 tsp fresh chopped rosemary
Salt and pepper to taste

Wasabi Mustard
2 tbsp of Dijon mustard
4 tbsp of crème fraîche
1/2 tsp of wasabi
Salt and white pepper to taste

Curry Ketchup
1/2 cup ketchup
2 tsp curry

Instructions:

1. Turn your oven to 425°F.

2. Peel the potatoes and cut them into equal sized sticks, about a 1/2 inch wide. Toss the pieces that are too small because they will burn in the oven.

3. Rinse the potatoes pieces and place them in a large pot of boiling salted water. Boil for 2 minutes. Strain the potatoes and rinse them in cold water until they cool. Place the potato sticks on a layer of paper towels and let them dry off.

4. Once dried, place the potatoes on a baking sheet lined with parchment paper. Dribble the oil on top and toss the potatoes with your hands until the oil is evenly distributed. Spread the potatoes evenly along the baking sheet, and make sure that the potato pieces are not touching each other.

5. Bake the potatoes in the middle of your oven for about 30 minutes. Turn the potatoes after about 15 minutes so they get even color.

Rosemary Mayonnaise
1. Mix the mayo and rosemary.

2. Let it sit for at least an hour in the fridge. When you are ready to serve the sauce, add salt and pepper to taste.

Wasabi Mustard
1. Mix the mustard and crème fraîche in a bowl and add the wasabi. Start with 1/4 tsp and taste the mixture. Then add the rest to desired spiciness. Keep in mind that the flavor will be enhanced the longer the dipping sauce sits.

2. Let the mixture sit for at least an hour in the fridge. When you are ready to serve the sauce, add salt and pepper to taste.

Curry Ketchup
1. Mix the ketchup and curry, and let it sit for at least an hour in the fridge.

Serving tip:
Nothing says "party" like individual serving cups—they are easy for your guests to hold while mingling and look great. Serve the fries in decorative cones made out of any decorative paper or even something simple like a newspaper (why not the yellow pages?). Roll the paper into proportionate cones, line them with wax paper, and staple them at the edge. Serve the cones on a tray with the dipping sauces. Make the perfect tray yourself by punching holes in a box lid and placing the cones in the holes.

Simplify:
Buy frozen French fries from your grocery store that just need to be heated or even ready-made ones from a restaurant. Get rid of the "evidence" and serve the fries in decorative cones with your homemade sauces.

For a challenge:
Chop fresh herbs and mix with the pommes when they come out of the oven. It looks, smells, and tastes great. You can also use different colored potatoes, such as red skinned, orange sweet potatoes, or blue potatoes of the delta blue variety.

Thursday, August 7, 2008

Guest Blog #3: Who says that camping means beans and weenies?

The following is the third in an ongoing series of guest blog appearances by friends and family. This post is from a repeat guest blogger. You may remember them from a Valentine's post featuring THE BEST chocolate cake any of us have ever eaten. This time, they take their kitchen outdoors! Much thanks to my parents Mike and Sarah for sharing their recent Coleman stove culinary adventures. They are traveling through Canada this month on a grand summer vacation. Read on for some dinners in the great outdoors that will leave you jealous...

Who says that camping means beans and weenies?
by Mike and Sarah Rawley

So ..... who says that camping means beans and weenies and s'mores? (not that I have anything against that sort of thing, hot dogs with canned chili and cheese makes a great camping dinner!)

We're in Jasper, Alberta and what you see is a genuine Alberta rib eye, so delicious and tender it could make a meat eater cry. A big difference between US beef and Alberta beef is that while the US finishes the cow with corn, ranchers use barley here in Western Canada. They didn't mention if the barley was in the form of beer, but I'd imagine really happy cattle then. Add some fresh green beans, fry up some new potatoes and what a tasty dinner! Oh yeah, the wine is from Canada too and the packaging is custom made for camping!

Happy eating!!!Dad took a little piece of an iceberg from the glacial lake today so that we could chill the cava that we brought along with us. We made a great pasta with ready made sauce, which we added bacon to, and then completed with a salad. We paid $20 for a salad like this 2 nights before and decided not to resent our greens so much and make it for ourselves. The peaches are from Alberta and the baked goods are from a very nice bakery in town. Tonight we listened to Puccini (after asking our campground neighbors permission), drank champagne chilled from 400 year old water and ate like royalty.

The sun stays light until about 10 pm so now we are having a cup of tea, playing backgammon, reading a little bit and thinking about our beautiful daughters. Life is good.

Monday, August 4, 2008

My new Schwinn Hornet.

Oh, isn't she pretty. Meet my new cruiser bike. This pretty little piece of bi-pedaling metal and rubber is a 1960's Schwinn Hornet Cruiser. She sports a single speed and pedal breaks, and now, thanks to me, a roomy wicker basket and new tires. All in all, she is ready to ride, ahem, I mean cruise!

Look at the basket! The basket alone is enough to inspire fantasies of vintage bicycling bliss. When I look at the bike I immediately flash to daydreams of myself in action. In my daydream, I am poised like a superheroine, with my circle skirt flapping in the breeze behind me as I pedal down the street on a mission to spread baked goods, vintage dresses and homegrown produce throughout the neighborhood. I will call myself Cruiser Girl, and my reign of power will be one of cookies and lemonade sipped on front porch steps.

My secret weapon will be my wicker basket. I will fill it with fresh baked muffins tied up in a pouch hand-sewn using vintage linen scraps, and I will bike to my neighbors and spread love like only warm chocolate chip banana muffins can. I will ride to the organic florist and fill the basket with a bouquet of fresh flowers, gently gliding to a stop using my Hornet's pedal breaks in order to hand blossoms to young and old women out for a stroll. I will bike to the farmer's market and stuff the basket with heirloom tomatoes, then bike slowly home so as not to upset the basket. I will use the tomatoes to spread the goodness of lycopene to those I love.

Aside from the obvious fantastical quality of these daydreams, you can tell this is a fantasy straight out of comic imagination, because where I live there is not an organic florist. There are also not any legitimate farmers markets. Oh yes, and I don't hand sew, not even muffin pouches made from vintage linens. But I do like the thought of all of the above, and still see myself in the above scenarios when I ride my bike. The bike is inspirational, and I hope it will someday lead me to a place where the above situations are plausable.

Some (Sam, and my sister Anne) have tried to tell me that this old bike is too heavy, that it is too old, and that a single speed bike is outdated. They tried to convince me that it will render me slow, tired, and deject. They tried to convince me to stick to my 21 speed mountain bike. But for me, the adorable style of this little Cruiser outweights any potential drawbacks.

For now, I am willing to trade my gears for style. I hereby gladly commit to huffing and puffing up the hills in my neighborhood in order to look and feel adorable on my new bicycle. I hereby commit to hollering "wait for me" at my hubby as he speeds away on our afternoon ride to the pool. I hereby commit to stronger legs and a toned behind courtesy of my single speed pedaling. I commit to these things in the name of nostalgic fashion, and feeling like a pin-up Superheroine on wheels!


Friday, August 1, 2008

Worthy of my Île de Ré sea salt.

There are not many culinary endeavors worthy of my hand-harvested sea salt from Île de Ré, France, but oddly enough, these chocolate chip cookies are one of them. I know what you are thinking... "Chocolate chip cookies and sea salt...Yuck." But don't judge the cookie too quickly, because I have never, and I mean NEVER, tasted a cookie as delicious as this cookie. And this cookie owes its novel and exceptional flavor to the salt!

The secret lies in the sea salt sprinkled on top. I used "Fluer de sel (Flower of the sea)" sea salt described on the package as "hand-harvested in the ancient tradition, when salt was a precious commodity. From salt marshes of France's Île de Ré on the Atlantic coast, it's gathered only three months of the year, when the sun is at its strongest. Neither treated nor washed, Fleur de Sel is rich in Magnesium and imparts an intense, pure salt flavor to foods."

In addition to tasting delicious on cookies, Île de Ré sea salt holds a fond spot in my heart because it comes from a place where I spent a brief amount of time while I was abroad my junior year of college. That semester, I spent my spring leave traveling through France by myself. France was a beautiful cultural experience and a wonderful change from Ireland, where I was studying in Galway, but it turns out traveling alone through France when you don't speak the language can be very lonely.

That is why it was so special when I met up with my roommate Elizabeth partway through my travels. She was abroad in France studying in Nantes. We met La Rochelle for a long weekend midway through my trip. I remember vividly that we rented adorable cruiser bicycles and road to
Île de Ré over a loooooooong 3 kilometer bridge. I don't remember seeing any salt marshes, but I do remember that we stopped at small shops on the island and purchased a picnic, placing each bit of cheese, bread, and fruit in our bike baskets before riding on to a picnicking location. At the end of the day, after riding more than 34 kilometers (thats 21 miles!) on behinds that were not used to biking, we had to waddle like sore cowgirls to dinner at La Petite Souris, or "The Little Mouse" restaurant.

The restaurant was all about cheese, and Liz convinced me to order raclette, which I remember being one of the most amazing meals I ate while I was in France. I actually pulled out my abroad journal to see how I memorialized the experience on paper, and in my entry about La Rochelle I wrote, "Liz convinced me to order raclette, a super fun food that involves toasting cheese in a waffle iron-style utensil and drizzling it over sliced meat and potatoes. The meal tasted delicious. We sat at a table with wooden benches and shared our space with two other French couples." My journaling does not do justice to the experience. I remember being so delighted to be with an old friend in a new place, recovering from our bike ride to with wine and cheese and lots and lots of conversation.

However, I deviate from the purpose of this post, which is to tell you about the most AMAZING chocolate chip cookie I have ever eaten. It's the sea salt, and I am sure the mounds of butter, and the thorough 36 hour chill that makes this cookie what it is. DELICIOUS.

I strongly encourage you to make the batter yourself, as soon as possible. It does need to chill overnight at the least, so you will need some patience. But make the batter now, and by the time you bake the cookies tomorrow you will be good and ready for a warm, gooey, chocolatey rich bite. One last word of advice, we all know baking is a precise art. That is why this recipe is written in both volume and weight. If you have a kitchen scale, think about using it here. As Alton Brown demonstrated on his Good Eats on chocolate chip cookies, the same weight of flour can take up massively different volumes depending on how much air is in between each little flour particle. You half cup one day will be different from the same half cup a different day. Don't take any chances and weight your ingredients. You won't be sorry.

Choco
late Chip Cookies
Adapted from The New York Times, David Leite, and Jacques Torres

2 cups minus 2 Tbsp. (8 ½ oz.) cake flour
1 2/3 cups (8 ½ oz.) bread flour
1 ¼ tsp. baking soda
1 ½ tsp. baking powder
1 ½ tsp. coarse salt, such as kosher
2 ½ sticks (1 ¼ cups; 10 oz.) unsalted butter, softened
1 ¼ cups (10 oz.) light brown sugar
1 cup plus 2 Tbsp. (8 oz.) granulated sugar
2 large eggs
2 tsp. vanilla extract
1 ¼ pounds bittersweet chocolate chips or chunks, preferably about 60% cacao content, such as Ghirardelli
Sea salt, such as Maldon

Combine flours, baking soda, baking powder, and salt in a bowl. Whisk well; then set aside.

Using a mixer fitted with paddle attachment, cream butter and sugars until very light and fluffy, about 3 to 5 minutes. Add the eggs, one at a time, mixing well after each addition. Mix in the vanilla. Scrape down the sides of the bowl with a rubber spatula as needed. Reduce the mixer speed to low; then add dry ingredients, and mix until just combined. Add the chocolate chips, and mix briefly to incorporate. Press plastic wrap against the dough, and refrigerate for 24 to 36 hours. The dough may be used in batches, and can be refrigerated for up to 72 hours.

When you’re ready to bake, preheat oven to 350°F. Remove the bowl of dough from the refrigerator, and allow it to soften slightly. Line a baking sheet with parchment paper or a nonstick baking mat.

Using a standard-size ice cream scoop – mine holds about 3 fluid ounces, or about 1/3 cup – scoop six mounds of dough onto the baking sheet, making sure to space them evenly. Sprinkle lightly with sea salt, and bake until golden brown but still soft, 15 to 20 minutes. Transfer the baking sheet to a wire rack for 10 minutes, then transfer the cookies onto the rack to cool a bit more.

Repeat with remaining dough.