Friday, December 3, 2010

I'm stuffed with stuffing.

Actually, I WAS stuffed with stuffing. I wish I was still stuffed with stuffing. The stuff(ing) is good. I ate the last of the stuffing for breakfast on Monday. If you think about it, Thanksgiving stuffing is actually a perfect breakfast. It has sausage, egg, and bread - three things you would normally find on a hearty breakfast plate. I also put gravy on it, which down in Texas can be considered a breakfast food.

Those folks at America's Test Kitchen know how to make food tastes it's best, and they are not afraid to use slightly unconventional tactics to make it happen. Take this stuffing for example. To impart maximum turkey flavor (without inflicting food poisoning from stuffing an actual fowl), they acted on the concept of baking the stuffing with turkey wings sitting up top. The drippings filter into the stuffing as it bakes, and the essence of gobble is infused into the dressing. It sort of seems like braising stuffing. Even if that statement is giving the technique a bit more credit than it is due, at the very least, the chef feels like a hard core Thanksgiving aficionado during the baking process.

Turkey wings are inexpensive, and I promise you that at minimum it require little effort, and at best you will have stuffing that tastes DELICIOUS. And like I said, nothing makes you feel more like a die hard stuffing chef than taking extra steps to impart maximum turkey flavor. Also, nothing makes a more satisfying breakfast (except may a breakfast taco).

Bread Stuffing with Sausage, Dried Cherries, and Pecans
From Cooks Illustrated, November 2010

Two pounds of chicken wings can be substituted for the turkey wings. If using chicken wings, separate them into 2 sections (it’s not necessary to separate the tips) and poke each segment 4 or 5 times. Also, increase the amount of broth to 3 cups, reduce the amount of butter to 2 tablespoons, and cook the stuffing for only 60 minutes (the wings should register over 175 degrees at the end of cooking). Use the meat from the cooked wings to make salad or soup.

Ingredients
2 pounds hearty white sandwich bread (20 to 22 slices), cut into 1/2-inch cubes (about 16 cups)
3 pounds turkey wings , divided at joints (see photo) (see note)
2 teaspoons vegetable oil
1 pound bulk pork sausage
4 tablespoons (1/2 stick) unsalted butter , plus extra for baking dish
1 large onion , chopped fine (about 1 1/2 cups)
3 celery ribs , chopped fine (about 1 1/2 cups)
2 teaspoons table salt
2 tablespoons minced fresh thyme leaves
2 tablespoons minced fresh sage leaves
1 teaspoon ground black pepper
2 1/2 cups low-sodium chicken broth
3 large eggs
1 cup dried cherries
1 cup pecan halves , toasted and chopped fine

Instructions
1. Adjust oven racks to upper-middle and lower-middle positions and heat oven to 250 degrees. Spread bread cubes in even layer on 2 rimmed baking sheets. Bake until edges have dried but centers are slightly moist (cubes should yield to pressure), 45 to 60 minutes, stirring several times during baking. (Bread can be toasted up to 1 day in advance.) Transfer to large bowl and increase oven temperature to 375 degrees.

2. Use tip of paring knife to poke 10 to 15 holes in each wing segment. Heat oil in 12-inch skillet over medium-high heat until it begins to shimmer. Add wings in single layer and cook until golden brown, 4 to 6 minutes. Flip wings and continue to cook until golden brown on second side, 4 to 6 minutes longer. Transfer wings to medium bowl and set aside.

3. Return skillet to medium-high heat and add sausage; cook, breaking sausage into ½-inch pieces with wooden spoon, until browned, 5 to 7 minutes. Transfer sausage to paper towel-lined plate, leaving rendered fat in skillet.

4. Heat butter with rendered fat in skillet over medium heat. When foaming subsides, add onion, celery, and ½ teaspoon salt. Cook, stirring occasionally, until vegetables are softened but not browned, 7 to 9 minutes. Add thyme, sage, and pepper; cook until fragrant, about 30 seconds. Add 1 cup broth and bring to simmer, using wooden spoon to scrape browned bits from bottom of pan. Add vegetable mixture to bowl with dried bread and toss to combine.

5. Grease 13 by 9-inch baking dish with butter. In medium bowl, whisk eggs, remaining 1½ cups broth, remaining 1½ teaspoons salt, and any accumulated juices from wings until combined. Add egg/broth mixture, cherries, pecans, and sausage to bread mixture and gently toss to combine; transfer to greased baking dish. Arrange wings on top of stuffing, cover tightly with aluminum foil, and place baking dish on rimmed baking sheet.

6. Bake on lower-middle rack until thickest part of wings registers 175 degrees on instant-read thermometer, 60 to 75 minutes. Remove foil and transfer wings to dinner plate to reserve for another use. Using fork, gently fluff stuffing. Let rest 5 minutes before serving.

Wednesday, December 1, 2010

Sencha Blouse: Muslin #1 tweaks

Since I last photographed my progress on the Sencha Blouse Muslin #1, I added the neck facings with a 1.5 inch seem, which pleasantly opened up the neckline a bit. This was an improvement. I also tucked down the sleeve self-facings, and was remarkably impressed by the drafting of the pattern. Everything folded into a beautiful little cap sleeves, and it was so easy!

However, the bodice felt long in the back (You can see a photo of the Muslin #1 back, front and sides here, with a highlight of the puddling along the lower shoulder blade area). It was like I needed a mid-back "swayback" adjustment, or perhaps to shorten the bodice length all together.

Also, the front just felt too big (see photo here). This was in part because the front tucks needed deepened and moved. It was also because there continued to be excess fabric up above my bust, in my upper bust "hollow". I had already taken one substantial tuck out of this area to remove excess fabric, in what I call my "sway chest" adjustment, but perhaps it needs more?

So I redrafted the front tucks, making them MUCH deeper (each one is about 2 inches deep now) and moving them closer to center front. I also adjusted their angle and shape. The original tucks were deeper at the waist and then narrowed to add room for the hips. I am thick the whole way down, so my tucks are nearly even columns now. I also took the whole bit up at the shoulders by about 3/4 an inch in the front and back.

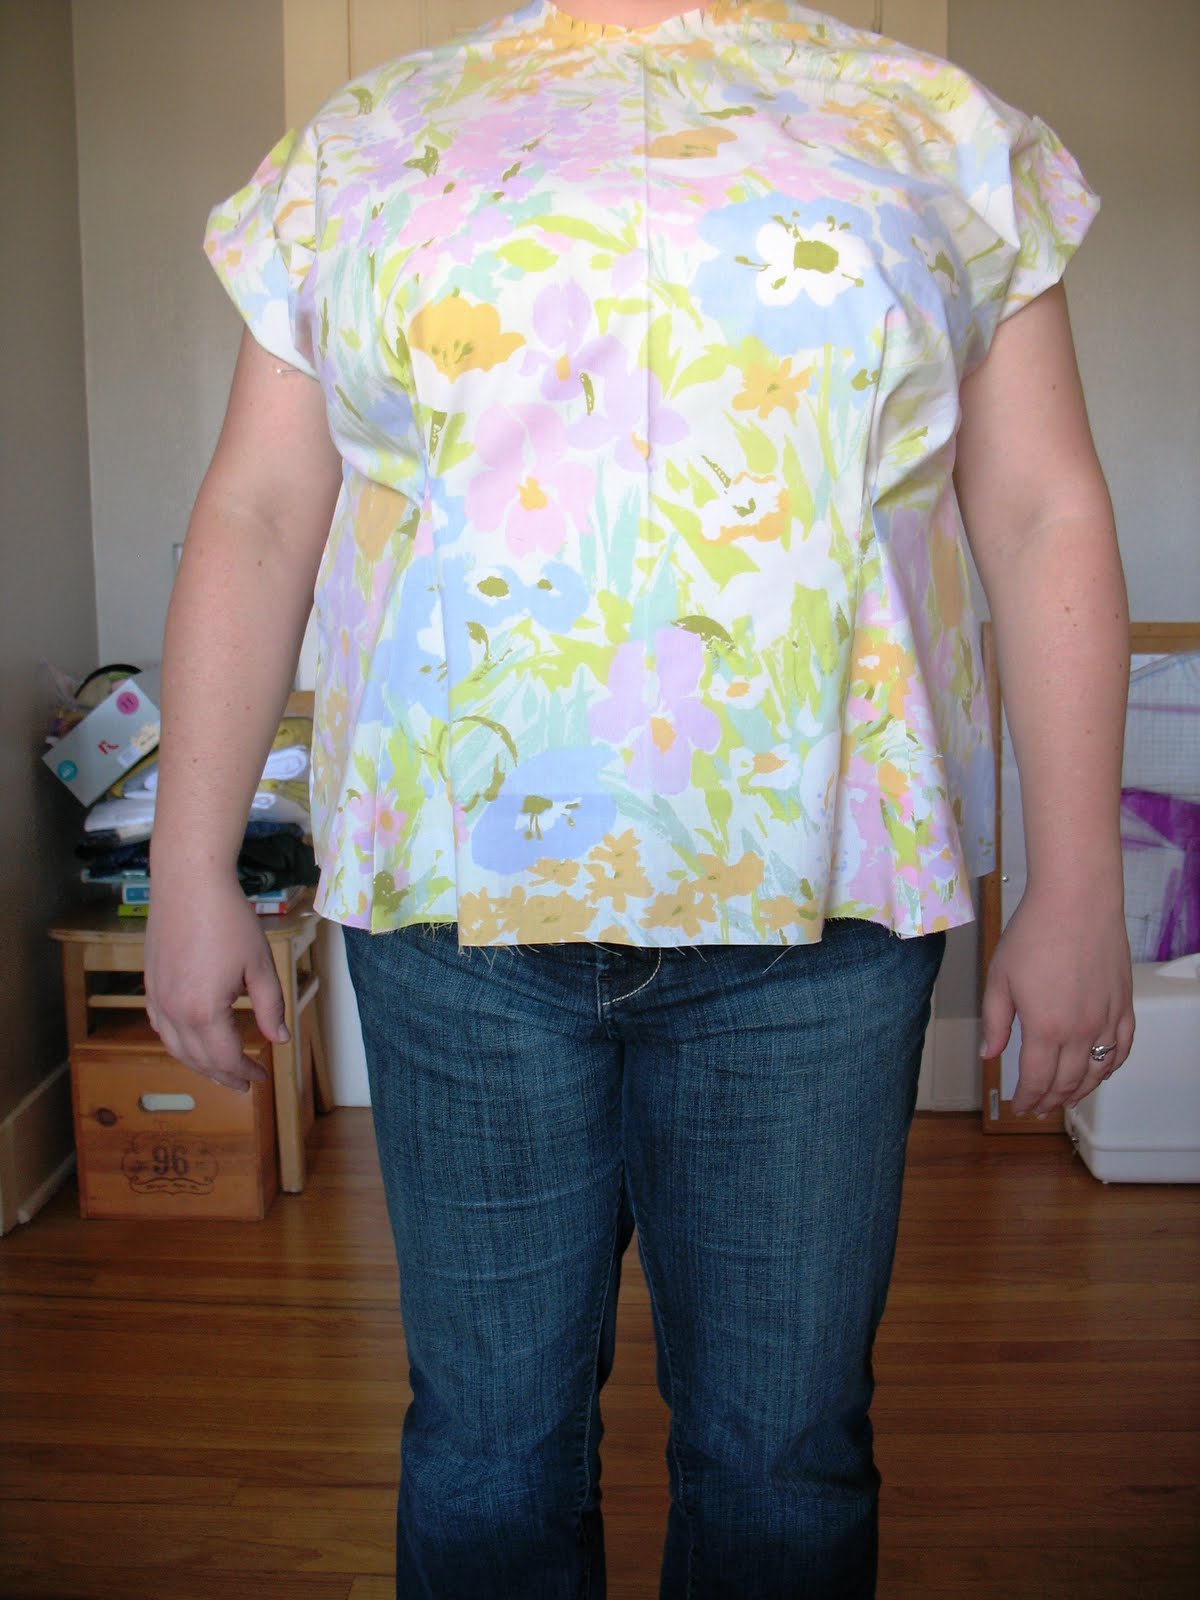
The front with re-drafted tucks and shoulders taken up. Now it is a bit too tight.
Also, it's pulling to the right, enhancing an unfortunate lopsided effect. Doh.

The back with the shoulders take up. The take up seemed to correct the excess material in the back, however a high swayback adjustment would probably achieve the same results without constricting the armholes.

Unfortunately, the whole blouse is now a wee bit tight, both across the chest and under the arms. You can see the strain across bust, especially where the front is torching toward my slightly bustier side (gah! asymmetry!). So I need to do one of a few things. Either 1) let the shoulders back out, and consider taking a tuck above the bust and in the mid back to correct the excess, or 2) leave the shoulders as is, but lower the armhole by 3/4 inch and lower the bust darts too, as needed. I think I might start by letting the shoulder back out. Even with the shoulder back down, the tucks still may need shifted down to give some breathing and blousing room to the bust.

Here is a big question though. I am starting to doubt my choice to eliminate the side dart created in the full bust adjustment (if you remember, I moved the dart into the waist tucks). Perhaps I would have been better served to leave at least some side dart, for better bust fit. Then again, it will be an ordeal to start from scratch. Decisions, decisions, decisions.

I do remain pleased that the side seems appear to be falling as they should.
So often I see a curve in the seem line in the shape of a sideways "m" where the seems is pulling first across my bust, then straightening, then pulling forward again around my midsection. This seem seems to fall almost perfectly down.

Tuesday, November 23, 2010

The three "B's" of Chili.

The best thing about this chili is all the "B's" involved: beer, bacon, and brisket. And of course, then there is the butternut squash. Technically this is the fourth "B" of the recipe, but I leave it out of the bragging title, because for some reason thinking about squash in chili turns people off. While bacon, beer, and brisket perk the salvation glands, the thought of squash can dry them right back up. So I leave it out of the title, even though the squash is the shining star of this pot. It totally and completely takes the chili from good to AMAZING.

When you scan the ingredients list, your first thought might be that this chili is destine to be scaldingly spicy. After all, it has anchos, chili power, and chopped green chilis to give it heat. But the interesting thing is that the final product actually tastes more sweet and earthy, thanks to the addition of the squash. Plus, in a no-bean chili, the squash adds a hearty dose of bulk and fiber to keep things healthy and filling. And the flavors meld so nicely, making this a very comforting fall and winter dish.

The first time we made this, we started it after dinner. It was for an event the next day, and we did not realize we were in for four hours of braising. Needless to say, that night we had to set the alarm into the wee hours of the morning several times in order to add ingredients, stir, and finally remove from heat, all in our jammies with bleary eyes.

This time, we budgeted our time accordingly. We made the chili for a Fake Surprise Party, also known as Lauren's Surprise Party #1. We needed something to eat as we pretended to be at her real party. To prepare, Sam and I spent all day in various states of chili making, and I do hope the final project met her fake party expectations. It must have been alright, because her husband John ate my portion's leftovers straight from my bowl (he did use his own spoon).

I highly encourage adding this to the fall repertoire, especially if you live in a climate even slightly reminiscent of autumn. It would go so well with a crisp afternoon, golden leaves on the trees, and perhaps some college football on the tube. Eat up, there might be a game of tag football in the leaves afterwords (or perhaps a real Surprise Party #2, depending on if you are Lauren or not).

Texas Beef Brisket Chili
Bon Appétit* by Bruce Aidells* October 2008

A cold-weather favorite, this all-beef, no-bean chili gets added appeal from a seasonal ingredient: butternut squash. For best results, make the chili at least one day ahead so that the flavors have time to meld.

Ingredients
Chili:
* 6 large dried ancho chiles*
* 6 ounces bacon, diced
* 1 1/4 pounds onions, chopped (about 4 cups)
* 1 5-pound flat-cut (also called first-cut) beef brisket, cut into 2 1/2- to 3-inch cubes
* Coarse kosher salt
* 6 large garlic cloves, peeled
* 2 tablespoons chili powder
* 2 teaspoons cumin seeds
* 1 teaspoon dried oregano
* 1 teaspoon ground coriander
* 1 1/2 teaspoons coarse kosher salt
* 1 1/2 10-ounce cans fire-roasted diced tomatoes with green chiles (1 3/4 cups)
* 1 12-ounce bottle Mexican beer
* 1 7-ounce can diced roasted green chiles
* 1/2 cup finely chopped fresh cilantro stems
* 4 cups 1 1/2- to 2-inch chunks seeded peeled butternut squash (from 3 1/2-pound squash)

Garnishes:
* Fresh cilantro leaves
* Chopped red onion
* Diced avocado
* Shredded Monterey Jack cheese
* Warm corn and/or flour tortillas

Directions
Place chiles in medium bowl. Pour enough boiling water over to cover. Soak until chiles soften, at least 30 minutes and up to 4 hours.

Preheat oven to 350°F. Sauté bacon in heavy large oven-proof pot over medium-high heat until beginning to brown. Add onions. Reduce heat to medium; cover and cook until tender, about 5 minutes. Sprinkle beef all over with coarse salt and pepper. Add to pot; stir to coat. Set aside.

Drain chiles, reserving soaking liquid. Place chiles in blender. Add 1 cup soaking liquid, garlic, chili powder, cumin seeds, oregano, coriander, and 1 1/2 teaspoons coarse salt; blend to puree, adding more soaking liquid by 1/4 cupfuls if very thick. Pour puree over brisket in pot. Add tomatoes with juices, beer, green chiles, and cilantro stems. Stir to coat evenly.

Bring chili to simmer. Cover and place in oven. Cook 2 hours. Uncover and cook until beef is almost tender, about 1 hour. Add squash; stir to coat. Roast uncovered until beef and squash are tender, adding more soaking liquid if needed to keep meat covered, about 45 minutes longer. Season chili to taste with salt and pepper. Tilt pot and spoon off any fat from surface of sauce. DO AHEAD: Can be made 2 days ahead. Cool 1 hour. Chill uncovered until cold, then cover and keep chilled.

Garnishes: Set out garnishes in separate dishes. Rewarm chili over low heat. Ladle chili into bowls and serve.

*Available at many supermarkets and at specialty foods stores and Latin markets.

Monday, November 22, 2010

Surprise! Happy Birthday Lauren.

Surprise Party #1
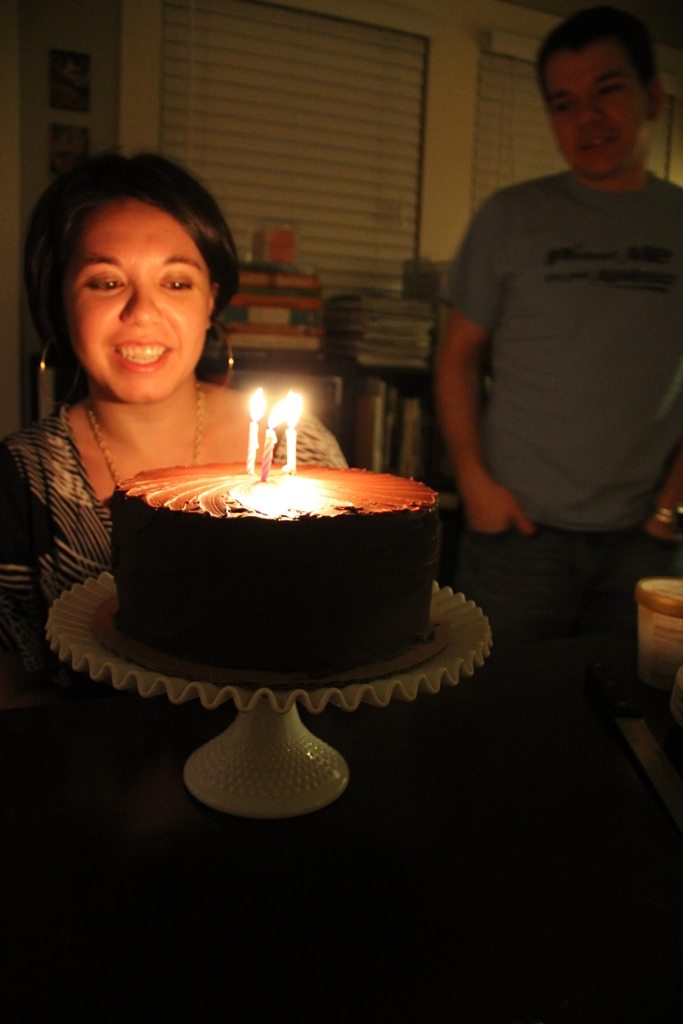
SURPRISE! Happy Birthday Lauren. Today is your real birthday, but this weekend, it was your birthday x2. That is because this weekend we celebrated your birthday twice, with two surprise parties. Haha, I hope at least one was a big surprise.

It all started with Lauren's husband John. He wanted to do something nice for Lauren, to commemorate her 28th birthday. So he asked for his friends' assistance throwing a surprise party. We all agreed to brunch on Sunday, the day before her birthday. It would be a wonderful surprise. Plus, we know this great little place downtown doing $1 mimosas for brunch (in case you are wondering, that place is Insignia, and it's good). A nice morning buzz is always a crowd pleaser. So John sent out an Evite and plans were made.

Then came a hitch. Lauren's brother called. He had good news. He said he was getting married! But it was also bad news, because the impromptu wedding was the same weekend as the surprise party, and in Dallas. Of course Lauren wanted to go to Dallas for the weekend. But what about the surprise party?!? John had to think quick to save the plans and make it to Dallas for the wedding, so he told Lauren we were having a party for surprise party for her... on Saturday night.

Wait. What? A surprise part on Saturday night?

Yes. A surprise party on Saturday night. To maintain his original ruse, John arrange a second surprise party to foil the REAL surprise party on Sunday. Except of course Lauren knew about the Saturday surprise party. But she didn't know we knew she knew, even though we all knew she knew, because it was a fake surprise party that we planned only after she knew. So to keep things as they were supposed to be, we all continued to pretend Saturday's party was a surprise, event though everyone involved was faking.

Sound confusing? It was! And it was very silly and funny, except we couldn't laugh about it until Sunday morning after the second surprise. Basically it was like those of us on the inside were double agents, working one surprise party against the other. And yes, while it was confusing and didn't make sense to all of us, it made sense to John. So we obliged. After all, we do like Lauren, and John, and parties. So it wasn't a big loss to throw two parties. Plus, she flew to and from the wedding on Saturday, so it was the best of all worlds.

The good news is that two parties in honor of Lauren's birthday meant many good things. First, it mean three carafes full of mimosas on Sunday morning, followed by a two hour midday nap. Second, it meant Virginia Green's Chocolate Cake from the Liberty Bar on Saturday night. Third, it meant making the Three B's Chili for a crowd at my place, as part of Fake Surprise Party, otherwise know as Surprise Party #1. I will post the recipe for the chili tomorrow, because it is so good it deserves it's own post aside from a birthday shout out.

So, in summary, Happy Birthday Lauren! Watch out, we just may be showing up on your lawn tonight to yell surprise again, when you AND John least expect it. Or maybe we won't. You just never know, do you?

Surprise Party #2


Thursday, November 11, 2010

Lamb ragu, and an almond tart for YOU!

Enough sewing already. Sometimes a girl's gotta eat. And sometimes when she eat,s she cooks a three-course meal for her friends from her new Mario Batali cookbook. And if she and the rest of the eaters are lucky, they end their eating with a big piece of dessert. This dessert is a Crostata alle Mandorle, also known as an almond tart. It combines almond, apricot jam and chocolate, and that is why it is good.

I asked my friend Lauren as we ate the tart if she thought it might count as healthy, since it is packed full of almonds, and (raw) almonds are one of those high fiber, high protein super foods. She responded "No, and you wanna know how I know that?...Because this tastes GOOD." She is right. Things that tastes good like this tart are probably never as healthy as your mid-morning snack of 6 raw almonds. That would just be too good to be true.

It was fun to make, because 1) I got to knead the tart dough, which is such a luxury. I am used to dough that should be touched as little as possible to prevent toughness, which always gives me anxiety (Think "Ahhhh! did I overwork the dough, have I ruined the dessert?!? Gahhh!!!). And 2) because I got to beat egg whites with sugar until glossy stiff peaks. It was beautiful, a wonderful texture, and tasted good. I don't get to beat egg whites often.

The recipe involves using both a food processor AND the stand mixer, so it is a bit heavy on counter space and dishes, but other than that I found it very simple. I sliced it very warm, and it did not hold together as firmly as I imagine a tart should, but after cooling it seemed to have a more solid body. The jam is a bit acidic, which balances some of the sweet, and little bits of chocolate throughout add a nice, satisfying cocoa fix that we all look for in a desert, without being too rich. I fully expect to add this to the dessert files to be made again, preferably after a hearty lamb ragu.

Almond Tart: Crostata alle Mandorle
from Mario Batali's

Ingredients
4 ounces (1 stick) unsalted butter, plus more for pan
1 3/4 cups all-purpose flour
1/2 cup ground toasted almonds, plus 2 cups
1/2 cup sugar
1 egg, plus 3 egg whites, plus 1 egg beaten
Salt
1/2 cup apricot jam
1/2 cup semisweet chocolate, finely chopped

Directions
Butter the bottom and sides of a 9-inch tart pan with a removable bottom and set aside.

Toss together the flour, 1/2 cup almonds, and sugar. Cut the butter into the dry mixture until it is the consistency of fine bread crumbs. Add 1 egg and a pinch of salt and mix well, kneading slightly. Form the pastry into a ball, wrap in plastic wrap, and refrigerate 30 minutes.

Roll out the dough to 1/8-inch thickness. Line the tart pan with the dough, letting it hang over by 1-inch. Trim the edges, reserving the scraps and rolling them into a ball. Place the pan in the refrigerator for 30 minutes.

Preheat the oven to 375 degrees F.

Line the tart pan with waxed paper and load the inside with beans. Bake in the oven until the dough has firmed but is still pale about 20 minutes. Remove from the oven and set aside.

Beat the egg whites until they are thick and glossy. Spread the apricot jam in an even layer inside the tart crust. Fold the remaining almonds and the chocolate into the whipped egg whites and spread this mixture over the apricot jam. Bake 30 minutes. Serve warm or room temperature.

This is the ultimate juxtaposition. Four pounds of broccoli being washed for dinner, while I beat in a cup of sugar into egg whites. At least we ate a semi-balanced meal.

Monday, November 8, 2010

Sencha Blouse: Muslin #1

Yeah. Moderate success. Hope springs eternal. I CAN and I WILL have a successful Sencha blouse fitted and sewn in fashion fabric one of these days soon. And once I get the pattern right, I plan to sew up about eight of these babies and wear them every day, for every occasion. I will be comfortable and look classy AND have a do-it-yourself practicality.

However, because I love to self-torture, and because I have some perfectionist instincts, I have circled and noted all areas for concern and further modification above. Individual photos with some notes are also below for your viewing pleasure. And if you scroll to the bottom, I have found many examples of successful Senchas to provide further inspiration.

I know that the fabric pattern makes it a bit harder to see the design lines, but I think I can see the drag lines and areas of concern just fine. Perhaps a floral wasn't the correct pattern to sew a muslin with, but who cares? The truth is that the fabric came from two thrifted pillowcases, and I like them. I wish the fit would have been perfect here so I could wear the darn thing. I am going to sew the full process despite the fit errors in hope.

Further alterations that may be in order include:
  • small 1/2 inch forward shoulder adjustment
  • 1/2 tuck "sway chest/hollow chest" across front
  • 1 inch sway back in upper back
  • move center darts closer to center by a few inches, further away from the outside dart
  • redraft darts, taking them in deeper near the hips to eliminate excess
Front:
A lower neckline will be more flattering for sure. And I think unpicking the darts and re-clipping will allow me the flexibility to take them in as much as they need, plus allow me to place them at the most flattering place.

Back:
Not too shabby. It might be pulling a tiny bit at the center back waist, and I do see some fabric puddling in the swayback area. I can fix those.

Right side:
I want to limit some of the excess swinging forward between the darts. It is very maternity-ish. And even though I have a round "maternity-ish" stomach shape, I do not feel the need to dress it as such.

Left side:
Side seem:
I am pleased it seems to be falling evenly along my true side center, see how it matches up with my pants seem? No crazy pulling to the back or front is a good thing.

There are a number of finished Sencha's haunting the blog world that I have been looking at for inspiration and fit guidance. I am especially looking for fuller busted gals as examples. If their Sencha's all wrinkle in the same place mine does, than it must be a normal wrinkle, right?

Friday, November 5, 2010

Sencha Blouse: "Sway Chest" Adjustment question

To fill in the space or not to fill in the space, that is the question... or rather... To trim off the excess wedge or not to trim off the excess wedge, maybe THAT is the question. Bad Shakespeare puns aside, I do question how to finish my "hollow chest" adjustment, or what I am thinking of as my "sway chest" adjustment. I haven't really found an answer online or in my books.

That there above is a two inch tuck taken along my upper bust line, exactly where my breast curve stops and my chest begins. This is where the tissue wanted to be folded, so this is where I folded it. It indeed took me a bit of pondering and staring to figure out to fold this at all. During my fitting, I originally thought the center waist was not big enough, because the center front seam was sweeping out toward my side. As I played with the tissue, I realized the center front was swinging out because the upper chest was too long. If I tucked out some inches from the upper chest, it pulled the center waist into the correct position. Viola. Solution found. Almost...

Now I just need to figure out how to finish off this adjustment to keep things on grain.

This is my first sway chest attempt, although I have high, high hopes for it. You see, I have come to realize that I am indeed short in the upper chest. Too often in ready to wear, especially in blazers and jackets, my shoulder and neckline try to "stand up" off of my shoulders when I sit or relax. Lapels are always gaping away from my upper chest. Even in my fitted t-shirts, I get wrinkles and "puddles" of fabric over my bust. It's because my clothing is too long up there!!! I never thought much of it, but now I am starting to understand that I am wearing clothing that has been graded in length, not just width, to match my size. And I don't need extra length in my upper chest and shoulder area. I am short there.

Hence comes in the question. The "sway chest" tuck left an inverted curve in the center front chest area. So, do I fill it in? Or do I trim off the little wedge the is poking over the majority of the center front line. Both options are demonstrated below.

The "Trim off" Method:

See that extra wedge of pattern? I could trim that off to true the center front on a consistent grain line. But this will diminish the overall width at the center front a little bit.

The "Fill in" Method:
See that triangle gap in the pattern? I could fill that in to true the center front on a consistent grain line. This will add some width to the center front.

Being fairly new to sewing, I am a bit concerned what all these alterations are doing to the potential grain lines in my fabric. Heaven knows I don't want things stretching all wonky along the bias because I shifted the lines. But hey, trial and error is a great way to learn!

Thursday, November 4, 2010

Sencha Blouse: Tissue Fitting #2

Progress is happening, and it feels good. I really want to sew my Sencha muslin up this up this weekend (or sooner, if I work really, really quickly!). Any thoughts as I work through this fitting?

Front Alterations:
  • 2 inch full bust adjustment
  • large side dart transferred to two waist darts/tucks
  • armhole lowered 5/8 inch
  • 2 inch "hollow chest" tuck across high bust, tapering to nothing in armhole
Back Alterations:
  • 5/8 inch high round back
  • 1 inch wide waist
  • back tuck currently unpinned (I plan to add more width to this area, as I would like a back tuck)
Things are looking in the right direction. I need to make a few more adjustments and sew this puppy into fabric for another look at the fit. Good thing it looks so quick and easy to mock up.

p.s. Sometimes I really cannot believe I post these photos of myself on the Internet. Look at those droopy sweatpants, and that belly being pointed out ON PURPOSE! But then again, my sincere hope is that someday these will be documentation for another women with fit ills to see that yes, there are rotund people like her in the world, and yes, she too has the potential to fit and flatter her body. After all, there are many lovely bloggers out there currently offering me glimpses here and there of there own fit trial and error, even though I have yet to find my "doppelganger" sewist, I am hopeful. So please, judge not my appearance in these photos and instead look at them as instructional, education tools.

Wednesday, November 3, 2010

Sencha Blouse: Tissue Fitting #1

The bad news. I am on a long term hiatus with the Lady Grey Coat. It's just too advance for my fit skills right now, and no sense wiling away precious sewing time, energy, and patience on a project I am not ready for. The good news. I am moving on to another Colette pattern, one that is more my skill level.

I look at the Colette Patterns website at least once a week. I have added every pattern that might feasibly fit and flatter to my Amazon wish list. And this summer, because I just happened to be near a local fabric shop in Austin that carries that pattern, I FINALLY made one of the patterns my own. I purchased the Sencha blouse (and would have also purchased the Ceylon dress too, but they don't carry it).

And to make the decision to tackle a new pattern even sweeter, my dear husband did something he HATES to do, and helped me with the first round of tissue fitting. I diligently traced the pattern knowing it will be decimated in the fitting process, and then taped and pined as designed. Here are the results. I am not surprised that the blouse is too small and will require both full bust and wide waist additions.

First step is a high round back, wide waist on the back, major full bust adjustment, and probably some wide waist adjustments involving transferring the FBA dart too. I also think I might need to lower that arm hole a bit, it feels snug. Wish me luck on this Colette vision. I have high hopes it will be a step in the right direction!

Wednesday, October 27, 2010

The perfect blue room.

Our friend Reid lives in the cutest little house in Austin. It is THE BEST place to stay when we visit, for a few reasons. 1) Reid and his fiance Cameron are great hosts. They even put tiny shampoos and conditioners and toothpaste in the bathroom for their guests. 2) Reid's dog Lola is an English bulldog and perhaps one of the cutest, calmest, most lovely little dogs I have even been around. I would make the drive to Austin just to pet her. And 3) Reid's guest room is this tiny oasis that makes me want to move in, or put the room on a flatbed trailer to take back to San Antonio to be my master bedroom.

The walls are this deep, peacock blue. And Cameron has decorated the space absolutely perfectly, so that it reminds me of an Anthropologie catalog, only tempered appropriately for the real world (in the catalogs they are always doing crazy things, like putting the bed in the middle of a drained swimming pool at a mansion in the french alps, then lighting 10,000 candles on the floor... nobody could actually sleep like that!). The bed at Reid's place has a big, deep brown leather headboard. An antique dresses sits under a scalloped and etched wall mirror, with a vase of pink and yellow flowers and stacks of books adorning the top. The walls have two pieces of distinctive and one-of-a-kind art, including the above picture of a vase of blooming buds. When I wake up there in the morning and open my bleary eyes to the world, I feel so content to stretch out in the sheets and just enjoy the space for a few minutes before getting up. It is nice to be greeted by an aesthetic that makes opening my eyes first thing in the morning a treat.

And the bed is so very comfortable. But most of all, the little room is beautiful. Soothing. Rich. Vibrant. Calm. I hope someday to emulate its best feature in a room of my own, in a home of my own, to make a place for sweet dreams all my own.

Wednesday, October 20, 2010

Lady Grey Phase "Ghaaaaah": The fit problems.

"Gaaaaaah!"

That is what I have been saying all week (alongside some light expletives and some self deprecating and unfair internal chastising). This tissue fitting is a wreck. A hot mess of a wreck, I tell you. The bust is now too big, the lapel gapes hugely from my shoulders, and the entire fit is wonky and messy. I am not sure where to go with this. Back to the beginning, I fear.

So, after round one of the pattern alterations, I had the back fit pretty good. It might need a bit more room added in the seams or with a broad back adjustment to allow ease of moment, but all in all it was and remains pretty decent.

The front, however, needed more full bust room. I originally gave it an inch and a half FBA on either side, but my knockers wanted more (they always want more, they are such demanding knockers!). So I diligently traced a new front side and front center, with the first round alterations intact. Then I performed a second full bust adjustment using the same method, adding another 1.5 inches to the full bust.

Then I put it on. It is crazy huge. "Gaaaaaah!"

(I was trying to make a concerned face for theatrical effect, and it turned out like this... ha!)

With a bit of frustrated assessment, I see that it's as though my pattern demands the width, but not the fullness or length, of a second FBA. This second adjustment pulled the princess seam to my center front, and that is good. It also gave me fullness for a whole other boob to sit on top of my already ample bosom, and that is bad. And it added inches of length above my bust, toward my shoulder. This is one of the biggest problems because now there is an extra six inches or so of length that the two adjustments added to the front center piece. It is unwieldy.

In looking at these adjustments, it is as though I am short chested... is there such a thing? In the same way that a short-waisted person must tuck out length in the torso, I feel I need to tuck out length along the high bust. Otherwise the shoulders want to press up off my upper shoulder and around my neck, and my upper chest fabric gapes and flops open. I repeat, "Gaaaaaah!"

Oh man, I am SO discouraged. Given my feeling of failure (and the fact that I am out of tracing paper to redraw and start from scratch until my order arrives) I am going to set this project aside for a bit. Just until my tracing paper arrives. In the meantime, I will try a simpler Colette pattern. I have the Sencha blouse and it looks easy enough.

Wednesday, October 13, 2010

Lady Grey: The lining fabric is in too.

I received another envelope, this time with lining fabrics to match my favorite shell options. Now I can make the final decisions on fabric, finish fitting, and get on with the business of sewing this Lady Grey Coat.

The wonderful Elfriede in Boulder mailed these my way last week, with some help from my sister Anne. Anne knows I have been in a panic over the fabric choice, so when she offed to go look at Elfriede's inventory on my behalf, I had to say yes. Yes, I know it was out of her way, but I also know Annie has great taste. Plus, she knows my style and preferences, and I wanted her eye on this project. Thanks to her, I received these samples to match the shell options.

I am deep in conflict (again). Now I have so many pretty choices that I am nearly paralyzed. No one single combo stands out as perfect. Each has merits, each has flaws, and I find myself still concerned over price, ease of sewing, and wearability. So I don't know if that means that NONE of these choices are right, or if it means instead that there are just so many choices that no one combo will ever feel absolutely perfect. Or is it that I haven't struck the ideal option yet? I go back and forth and back and forth in this debate. The more I think, the worse it gets. Please offer your advice.

The first combo option high on my list is a cotton twill shell with cotton batik lining. The pros are that this fabric is easy to sew, will result in a casual (and thus easy to wear) garment, and is the least expensive of all of my options. The cons are that I don't love the batik lining, because in general batiks are not my favorite look. Additionally, batik is not a traditional lining because it is not thin and slippery, so I will be deviating from tailoring norms with this choice.

Cotton twill shell: $54 (4.5 yards x $12/yard)
Cotton batiste lining: $19.50 (3.25 yards x $10/yard)
Total fabric cost: $73.50

I do LOVE this silk tweed with blues, browns and taupes intermixed, and Elfriede sent a lovely golden china silk lining. The pros are that this is a very grown up look. The lining option is slippery, as a lining should be. The entire jacket will be silk, which is breathable and feel comfortable to wear in my south Texas climate. The cons are the expense of the fabric, plus a concern that this will be hard to sew. I have been warned I should serge every edge of the silk tweed before sewing, which will be challenging because I do not own a serger, nor have I ever worked on one before (I do however have access to one through my work, and would like to learn). Additionally, silk is slippery to work with, so the lining may be frustrating. But, then again, this is the fabric option I am most drawn to, pluse I think it will look classy with some tan gloves.

Silk Twill shell: $119 (4.25 yards x $28/yard)
China Silk lining: $32.5 (3.25 yards x $10/yard)
Total fabric cost: $151.50

Finally, Elfriede sent this abstract floral gold and teal silk charmeuse as an option for the silk tweed, but it turns out it matches a teal wool she sent with the shells samples. I love this combo, except for the price and the promise that the silk lining will be hard to sew. Pros are that this would be a traditional winter jacket, warm from the wool shell and slippery from the thick silk lining. The wool should be easy to sew. And the teal is a vibrant color that will stand out in this jacket pattern. The cons are that I do not need a warm winter jacket. Additionally, is it silly to sew a warm winter jacket with bracelet length sleeves? It strikes me as ironic to make a warm coat that will let cold air up the arms. Finally, this is very expensive. For the $200+ dollars I will spend on fabric alone, I could purchase a really nice jacket and have it tailored.

Wool Twill shell: $119 (4.25 yards x $ 28/yard)
Silk Charmeuse lining: $91 (3.25 yards x $28/yard)
Total fabric cost: $210

So I am again at a crossroads. You see, I have a history of purchasing more expensive fabric than I should, and then not succeeding on the final project. I don't want to do that again. But on the other hand, I am really trying to use this Lady Grey sewalong to complete a project by avoiding shortcuts and excuses, while using the opportunity to learn the professional tips and steps needed for a tailored jacket. In that regard, a pricier, lovely fabric is in order.

I would love any feedback. In the meantime, I will continue to refine my fit and study my tailoring guidebooks. Perhaps I will wait until I have the fit of the muslin 100% perfect before determining the final fabric. If the jacket promises to be a knockout, I can splurge. If my fit attempts falter, I should go with the less expensive option. Now I just need more tissue tracing paper for fitting... onward and forward!